When it comes to transferring songs to your MP3 player, you may think of connecting it to your computer using a USB cable and then copying and pasting the files. However, there are other advanced and convenient ways to complete the music transfer. In this guide, we’ll show you how to transfer music to an MP3 player using different methods, whether you prefer using your phone or your computer. You can choose what works based on your device, your setup, and how many songs you’re moving.
Transfer Music to MP3 Player: 4 Ways Compared
Before jumping into the exact step-by-step process, here’s a quick comparison of the four methods we’ll cover in this guide. So you can pick what fits your setup.
 Connect the player directly to your phone or computer using a cable or adapter.
You want to move large music libraries quickly.
Connect the player directly to your phone or computer using a cable or adapter.
You want to move large music libraries quickly.
 Remove the SD card from the player and insert it into your phone or computer ports (or via a card reader).
When USB doesn’t work — reliable for large transfers without connection issues.
Remove the SD card from the player and insert it into your phone or computer ports (or via a card reader).
When USB doesn’t work — reliable for large transfers without connection issues.
 Move files over Wi-Fi, Bluetooth, or cloud apps.
Adding a few tracks on the go (only on supported high-end players).
Move files over Wi-Fi, Bluetooth, or cloud apps.
Adding a few tracks on the go (only on supported high-end players).
 Use brand-specific software like Sony Music Center or iTunes/iPod tools.
When files need proper organization, formatting, or compatibility fixes.
Use brand-specific software like Sony Music Center or iTunes/iPod tools.
When files need proper organization, formatting, or compatibility fixes.
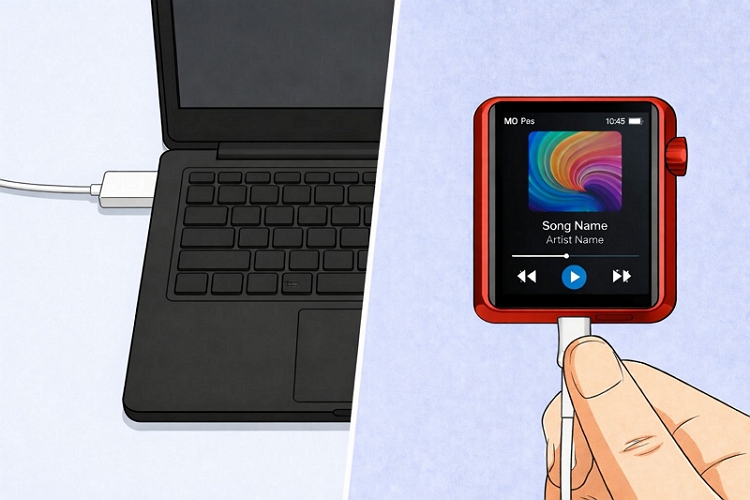
How to Transfer Music to MP3 Player with Direct USB Transfer
Wire connection is usually the easiest way to transfer music. All you need is a data-capable USB cable and in some cases, an adapter.
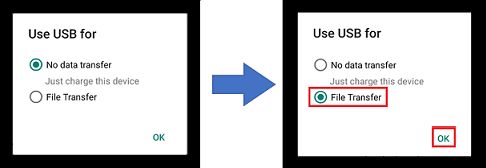
Keep in mind that some MP3 players will prompt you to choose a USB mode: MTP, MSC, or File Transfer. On most DAPs, this will appear as a pop-up when you connect it to the phone or computer. If it doesn’t, you’ll have to enter the mode manually from the Settingsby checking the device handbook for exact steps.
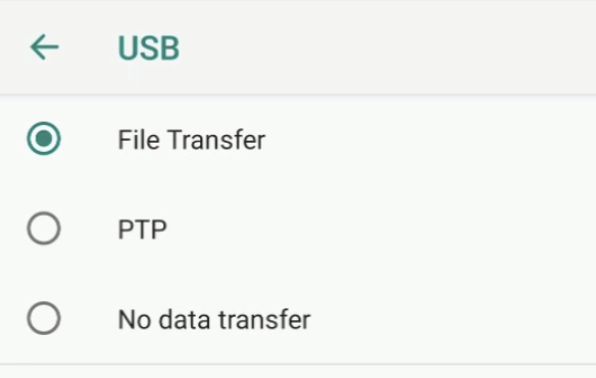
Only after selecting the correct mode will the player appear as storage on your phone or computer. From there, the steps will vary slightly depending on the device, so let’s look at them one by one.
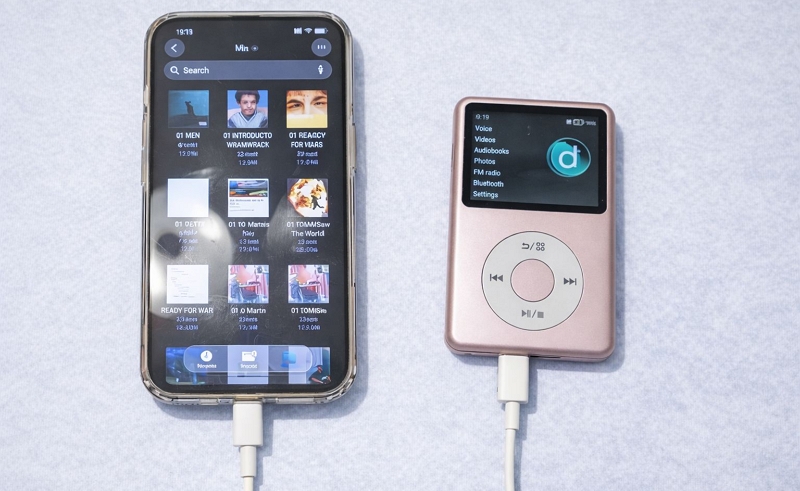
From iPhone to MP3 Player
You will need a physical adapter here.
- Lightning to USB adapter (older iPhones)
- USB-C to USB cable (iPhone 15 or later)

Step 1. Plug your MP3 player’s storage into the adapter (SD card or USB). Then insert the adapter into your iPhone’s charging port.
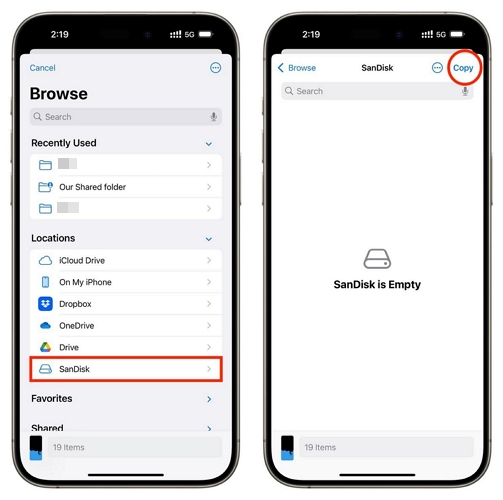
Step 2. Head to the Files app on your phone and navigate to the Browse screen. UnderLocations, you’ll see the connected drive under its name or sometimes just marked as “Storage”.
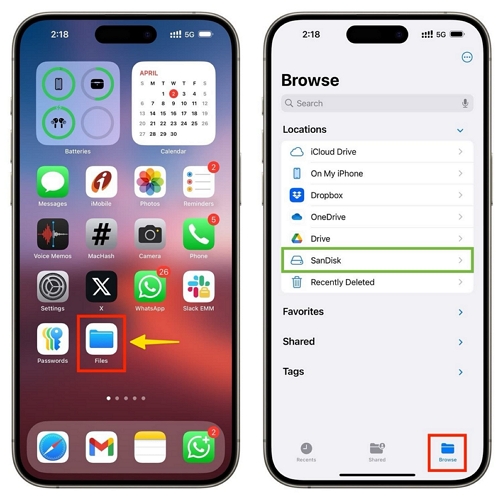
Step 3. Move to the music folder. Tap the ••• menu, choose Select and then mark the tracks or use Select All if everything is going.
Step 4. Step back to theBrowse screen using the < at the top-left. Enter the connected drive’s storage. Pick a folder or create one.
Step 5. Tap Copy at the top-right.
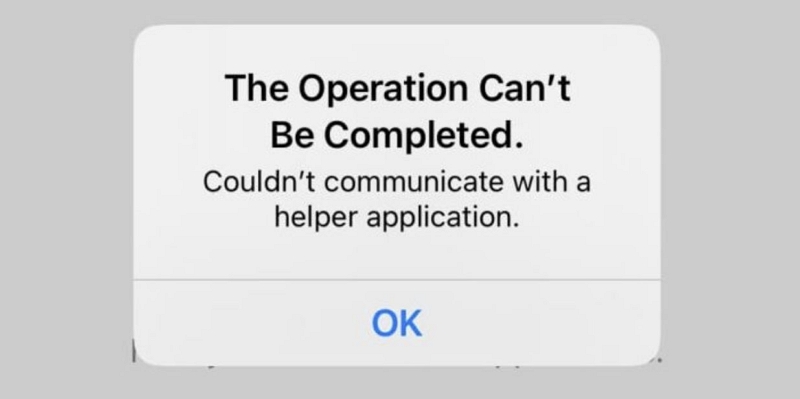
Sometimes you will see errors like: “The operation couldn’t be completed” or “Couldn’t communicate with helper”.
If that happens, check these first:
- Make sure the adapter and storage are properly connected and not loose.
- Check if the drive is still visible under Locations.
- Retry the same steps once again.
If the error keeps showing:
- This usually means iOS is not handling the external drive properly.
In that case, involve a computer: move the songs to the computer and then transfer them to the MP3 player.
From Android to MP3 Player
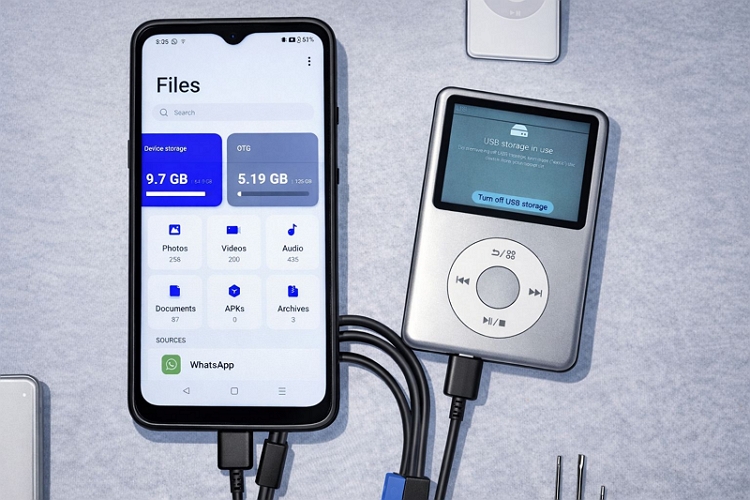
Many Android phones do include an SD tray, but it’s convenient to connect the MP3 player directly. As for the exact steps, the layout will change slightly across devices. The overall flow is the same on most brands: Samsung, Google’s Pixel, Xiaomi, OPPO, etc. Here’s what you’ll usually do:
Step 1. Step into My Files or File Manager on your Android. Then go straight to the folder where your music is stored.
Step 2. Long press on one track to wakes up selection mode.
Step 3. Build your selection by tapping more files or use the Select all option if you want everything.
Step 4. Tap Copy (or Move if you want the files removed from your phone).

Step 5. Now choose where to send it:
- On Samsung and similar devices: a pop-up will appear showing Internal Storage and connected drives at the top.
- On other devices: go back to the main directory and open the connected USB storage manually.
Step 6. Open a folder inside the MP3 player storage. Then tap Paste or Move.
Step 7. Wait for the transfer to complete.

If the transfer fails, here are the quick reasons:
- Transfer stops midway: unstable OTG cable or loose connection.
- MP3 player not recognized: file systems mismatch.
If it still feels unreliable, do one clean transfer using a computer, which avoids most of these issues.
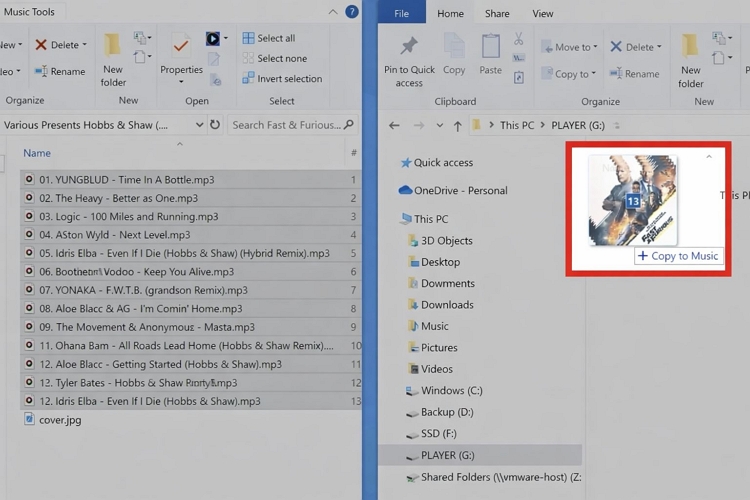
From Windows to MP3 Player
The route is very straightforward:
Step 1. Plug in the MP3 player. It will show up insideThis PC in File Explorer almost instantly.
Step 2. Head to your music folder and gather what you need by sweeping across with your mouse, pressing Ctrl + A or building a mix via Ctrl + click.
Step 3. Right-click and choose Copy or you can drag-and-drop directly.
Step 4. Bring up a second window with Ctrl + N and open your MP3 player’s storage. Both locations will sit side by side.
Step 5. Now either:
- Drag the selected files into the MP3 player folder.
- Or right-click inside the folder and choose Paste.
That’s it. Files will start transferring.
The process is really smooth and Windows can generally recognize all SD cards and MP3 players. If you see Device not showing in File Explorer, it often points to a cable issue. Many cheap cables are charge-only, they don’t support data transfer. So switch the cable.
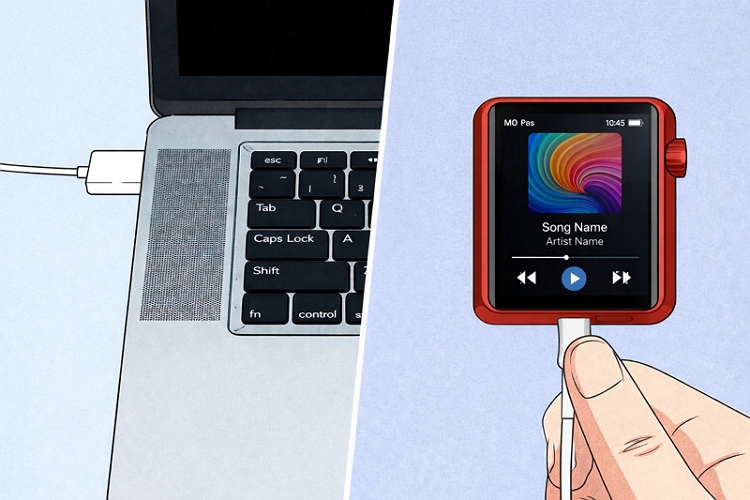
From Mac to MP3 Player
macOS works differently, but the idea is still the same — copy or drop.
If you connect the player via cable:
- Some devices like SanDisk players will show up normally.
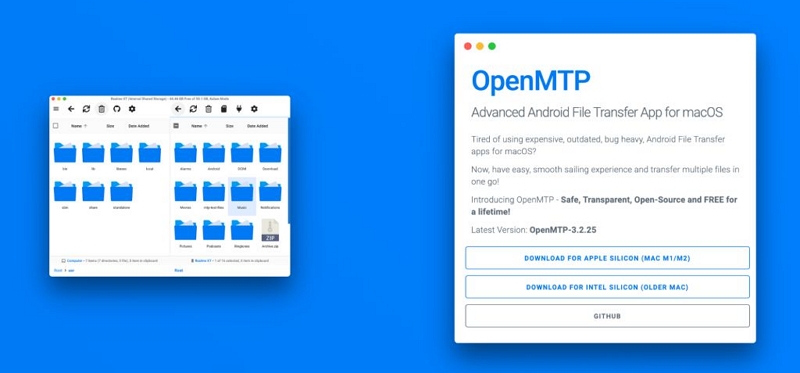
- Some Android-based DAPs (like FiiO, HiBy) will not show up directly, as macOS cannot read Android file systems. In that case, you’ll need tools like Android File Transfer or MTP support.
After your device shows up in Finder, here’s the flow:
Step 1. Open Finder and locate your MP3 player under Locations.
Step 2. Keep that window open. Now open another Finder window and go to your music folder.
Step 3. Select your songs:
- Hold Command and click to pick multiple tracks.
- Or drag your cursor to select a group.
Step 4. Press Command ⌘ + C to copy.
Step 5. Return to the Finder window. Press Command ⌘ + V or drop the files.
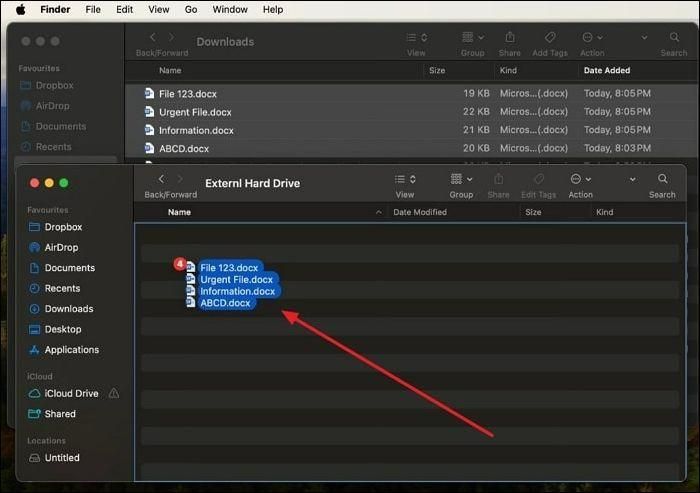
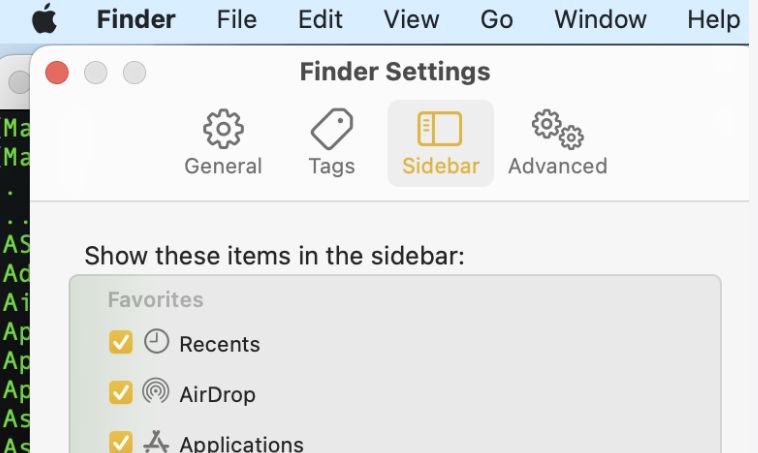
The only real friction on Mac is compatibility. macOS doesn’t handle all external devices (NTFS issues, etc). And sometimes the connected SD card or MP3 player won’t be detected, because Finder doesn't have permission to show external volumes. You can change that in Finder Settings and decide what shows up in the sidebar.
How to Transfer Music to MP3 Player Using microSD Card
You can remove the microSD card from your MP3 player and then connect it directly to your computer or phone itself for music transfer. Here’s how to handle the card safely, connect it properly and move songs effectively:
Step 1. Turn off MP3 player before removing the card.
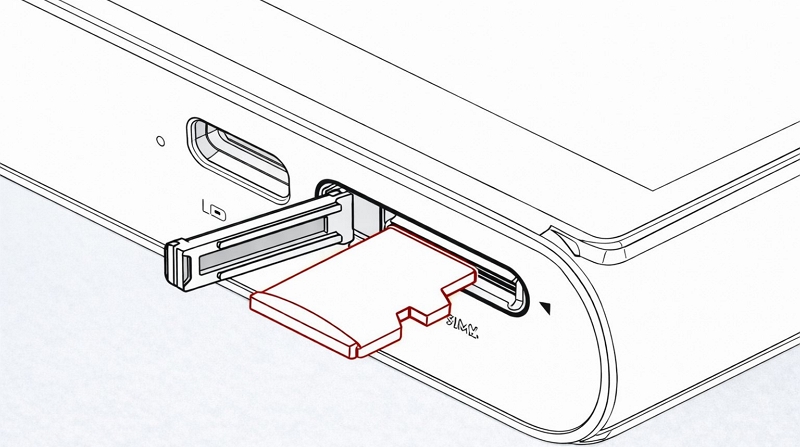
Step 2. Remove the microSD card. Most MP3 players use one of these two designs: tray-based slot or the push-to-release slot. So pop it out.
- Tray-based slot — you’ll usually need a small eject tool (similar to a SIM ejector) to open it. Common on touchscreen players like Sony Walkman or HiBy devices.
- Push-to-release slot (spring-loaded) — press the card slightly and it will pop out. More common on budget players.
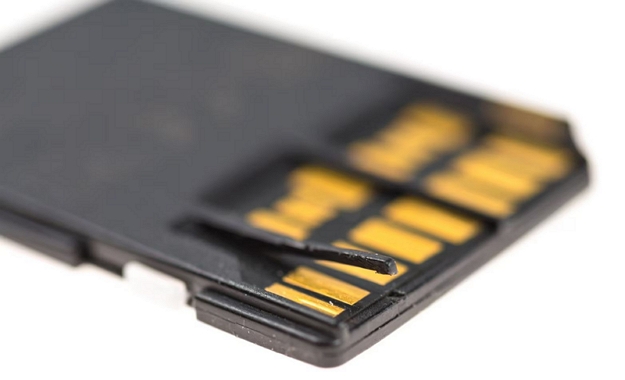
Once the card comes out, hold it by the edges. Avoid touching the gold contacts.
Step 3. Insert the card into your device:
- On Android phones: you can place it into the microSD slot directly.
- You’ll also get a dedicated slot on most Windows laptops: insert the card (gold pins facing inward).
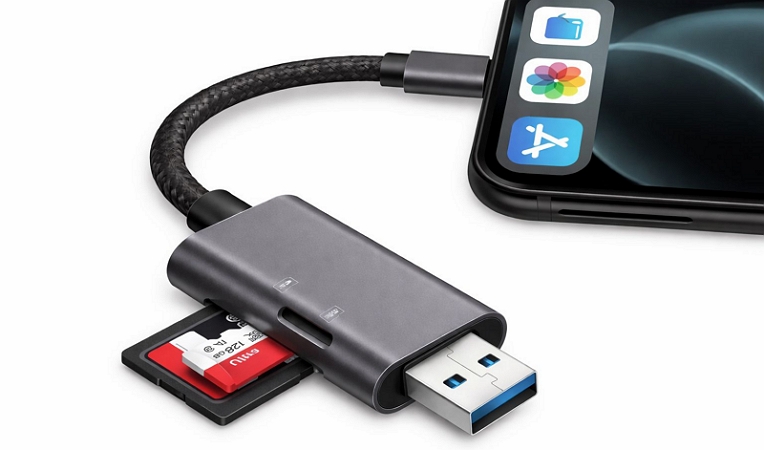
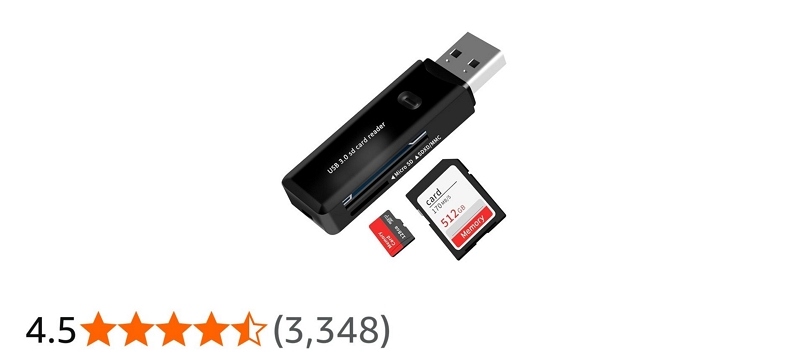
- If your device like iPhone or most Macs doesn’t have a slot, you’ll have to use an SD card reader.
You can find one easily online for around US$5–US$10. Just make sure you pick the right type:
- USB-C SD card reader: for iPhone 15 and later, MacBooks, and modern laptops.
- USB-A SD card reader for older Windows PCs.
Once connected, the card will appear in your file system:
- On Windows: under “This PC”
- On Mac: under “Locations”
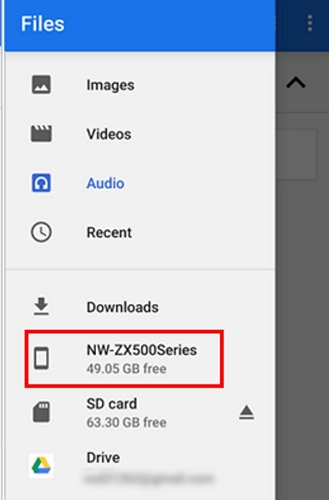
- On Android: inside your File Manager (like My Files or Files app)
Step 4. Follow the same copy and paste steps we covered in the USB method above, whether you’re using Windows, Mac, Android, or even iPhone.
Common microSD Card Issues and Fixes
There are a few things worth keeping in mind:
- Frequently removing and reinserting the SD card isn’t harmful. But it can damage the small gold contact pins. So it’s better to use this method occasionally for bulk transfers. Don’t make it a daily habit.
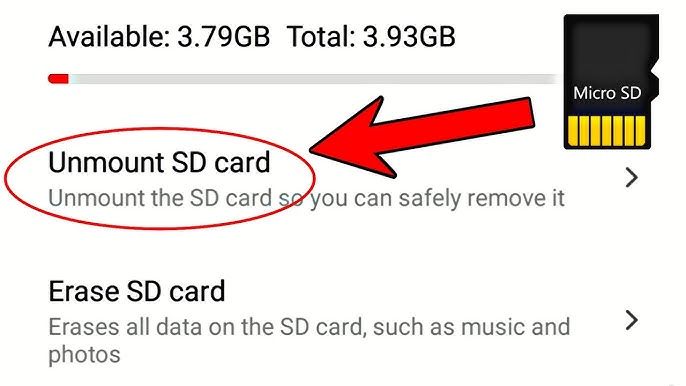
- Don’t pull the card out right after transferring files. Always use Eject (on Windows/Mac) or Unmount before removing it. This will prevent file corruption and keep your music safe.
How to Transfer Music to MP3 Player via Wireless Migration
Here, wireless migration simply means transferring your music without cables or SD cards either via Bluetooth, Wi-Fi protocols, or even through cloud storage apps. Not every MP3 player will allow this transfer method. Still, let’s see how to use the wireless transfer method.
Put Music on MP3 Player Using Browser
This mainly works on certain DAPs that support Wi-Fi file transfer. It mainly makes sense on Android-based DAPs that come with built-in Wi-Fi transfer systems (FTP, HTTP, or web UI). Models like FiiO M11 series, HiBy R3 line, and Walkmans support this. These players create a small local server and allow a direct connection over your network. Yes, your device and the DAP must be on the same Wi-Fi network.
For example, here’s how it works using a FiiO M11. These steps stay similar across other DAPs too.
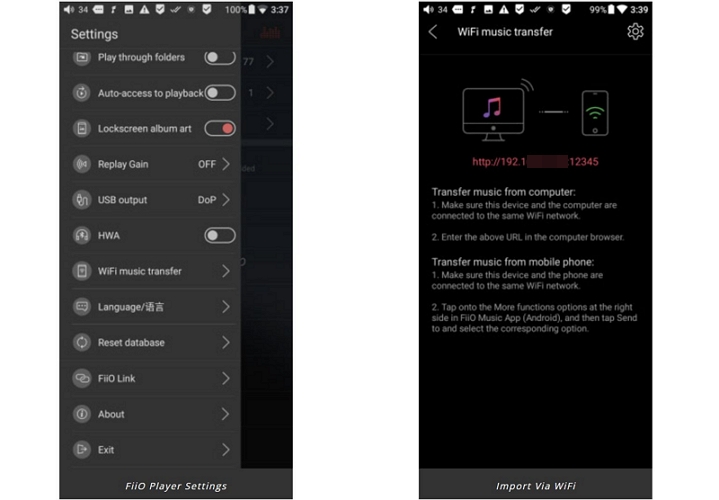
Step 1. On your FiiO M11, head into Settings. You will see a Wi-Fi Transfer option. On some DAPs, it will appear as Wi-Fi transfer or FTP.
Step 2. The player screen will show an IP address.
Step 3. Open any browser on your phone or computer. Type that exact IP address into the address bar. Hit Enter.
Step 4. A transfer dashboard will load. You will usually see an Upload or + button. Tap it. The file picker will open. Select your music files here. The transfer will start.
Note: Some players like FiiO M11 also offer this through their companion Android or iOS apps. You can use the app instead of the browser, as the process is smoother.
Overall, this is a clean and cable-free method, but it will also take more time than USB transfer. That’s why it is not suitable for large FLAC files.
Import Music to MP3 Player via Bluetooth
Most MP3 players do support Bluetooth, but here’s the catch. It’s usually meant for audio only, either sending sound to headphones or receiving it (wireless DAC). Full file transfer over Bluetooth is not common. Only a few Android-based DAPs handle this properly — models like FiiO M11 Plus, M23, and similar ones.
If your device supports it, the flow is simple:
Step 1. Open Settings. Switch on Bluetooth and let your player pair with your phone or computer.
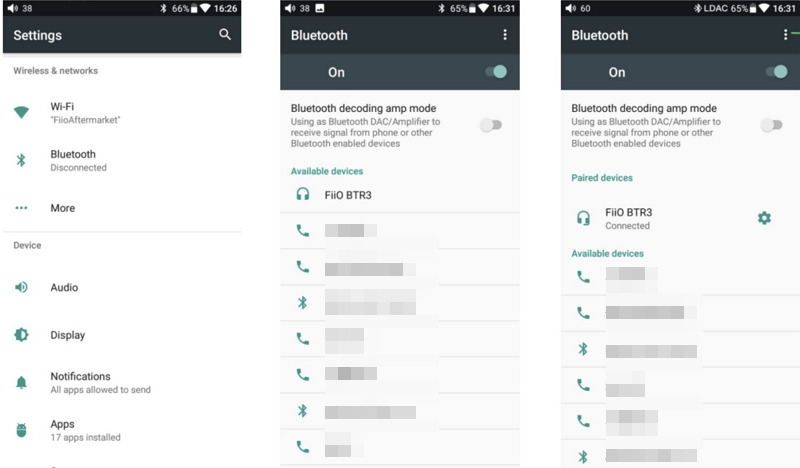
Step 2. Find your music file, right-click and send it through Share > Bluetooth.
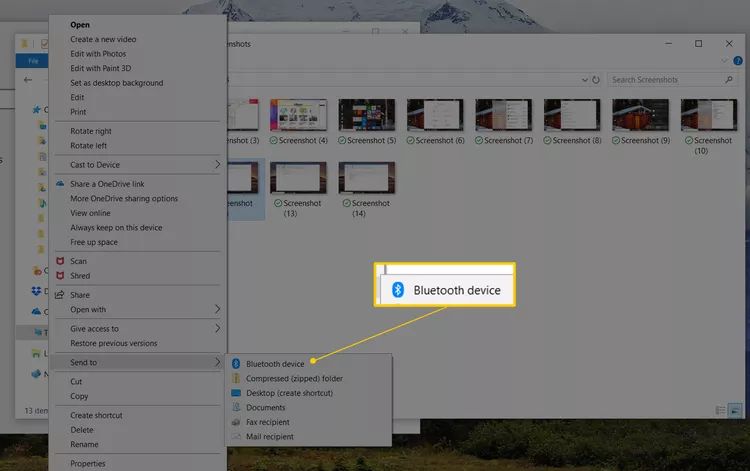
Step 3. Pick your MP3 player from the list that shows up.
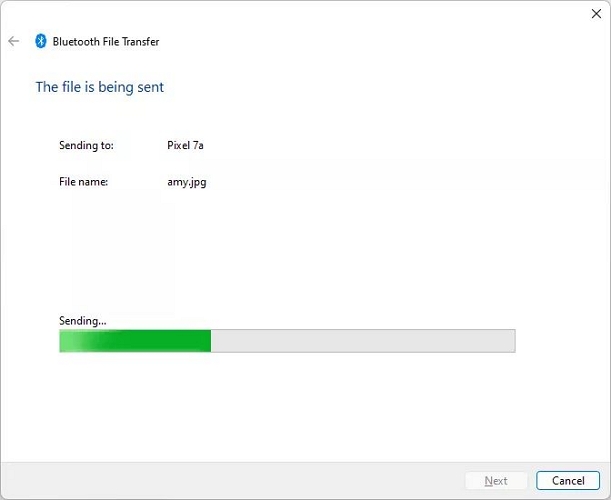
Step 4. The file moves across slowly, but it gets there.
It works best for a few tracks here and there. For large libraries, you’ll feel the wait.
Add Music to MP3 Player with Cloud Apps
Another option, especially on Android-based DAPs like Walkmans, FiiO, HiBy, is using cloud apps. These devices are basically high-end Android phones minus the calling feature. So they run Play Store apps just fine and support apps like Google Drive, Dropbox, OneDrive, etc.
Here’s what you can do:
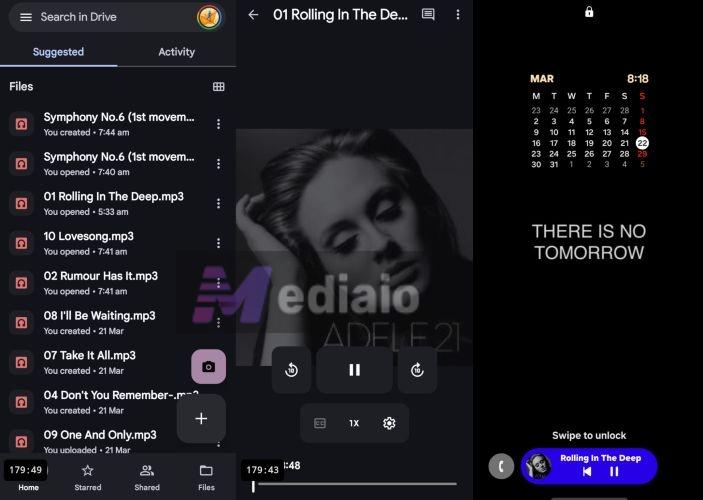
Step 1. Upload your music to Google Drive or any cloud service on your phone or computer.
Step 2. Open the same app on your MP3 player. Sign in with the same account.
Step 3. Download the files directly to your player’s storage and play them with the local media player. You can also follow this guide to play Cloud music without download.
How to Transfer Music to MP3 Player Through Official App
Some legacy and high-end audio brands do allow simple drag-and-drop transfers, but they still recommend using their own proprietary software. The reason is simple. These official tools help the player properly recognize and index your music inside its internal database. So if your MP3 player or DAP is not showing songs correctly after a manual transfer, this is usually the fix.
Tools like Sony Music Center for PC go beyond basic file copying. They:
- Organize high-resolution metadata and album artwork.
- Convert unsupported formats during sync.
- Push firmware updates directly to the player.
Here’s how the transfer looks when using the official app (taking a Walkman as an example):
Step 1. Install Sony Music Center for PC (not available for macOS).
Use File > Import to bring in single song files or entire music folders into the app interface.

Step 2. Connect your Walkman to the computer. Make sure it shows the USB connection notification and then select File Transfer mode.
Step 3. In the app, select your Walkman from the sidebar. You will see your imported music listed below — albums, artists, and folders already organized.
Step 4. Pick what you want to transfer. Then click the arrow icon (next to the album or selection) to start the transfer.
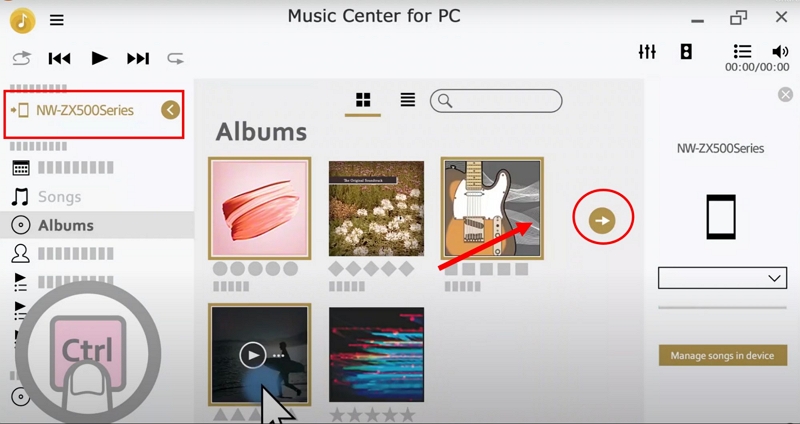
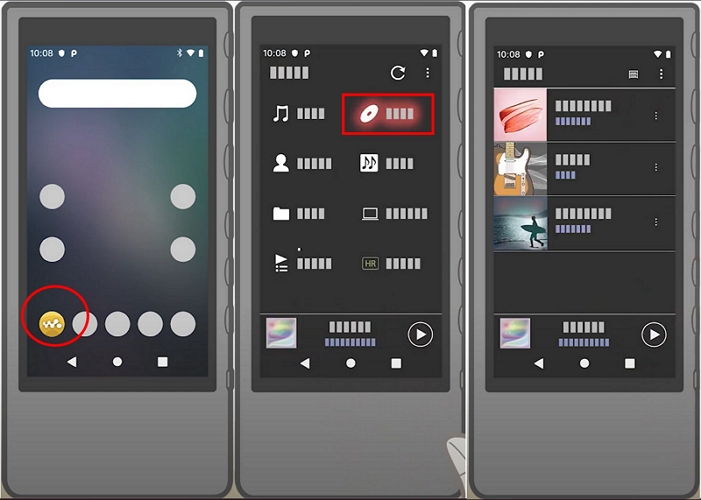
Once it finishes, open the music app on your Walkman. Your songs will appear properly arranged and ready to play.
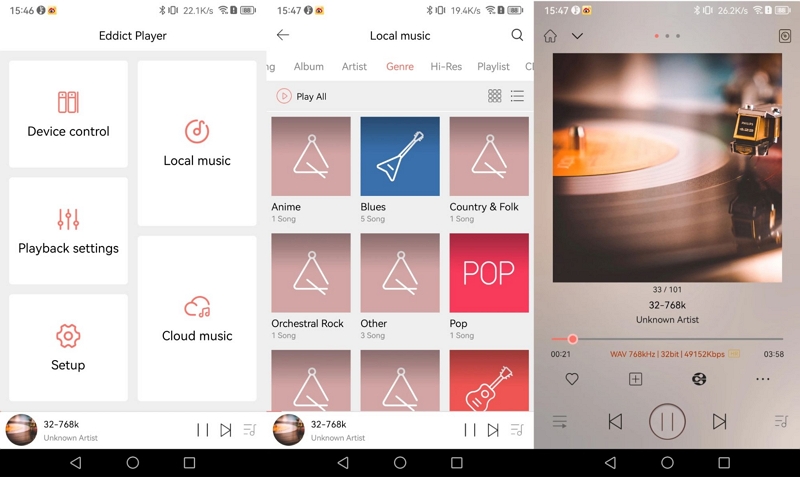
Note: Many DAPs like FiiO, HiBy, and Shanling also come with companion apps, such as FiiO Control, HiBy Music, or Eddict Player. These are mainly built for Android and iOS, and their purpose is not really file transfer (although some include Wi-Fi transfer utilities). They are mostly used to remotely control the player, such as managing your library, adjusting settings, and navigating easily, as DAPs usually have smaller screens.
Add Music to Your Apple iPod
As a classic MP3 player, iPod also requires official software like Finder, iTunes, or Apple Devices to add music.
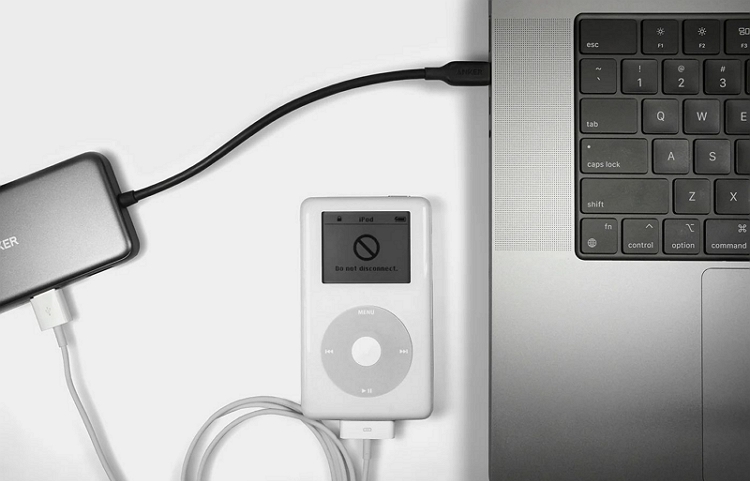
Step 1. Hook your iPod to your computer using a 30-pin or Lightning cable.
If a Trust prompt appears, tap Trust to continue.
Step 2. Launch iTunes, Apple Devices, or Finder.
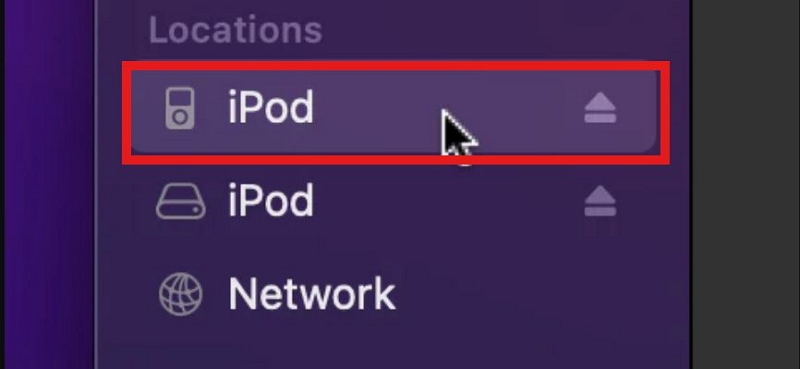
Step 3. Select your iPod from the sidebar.
Step 4. Switch to the Music tab. Tick the box for Sync Music. Now choose how you want your music:
- Sync your entire library.
- Or pick specific playlists, artists, or albums.
Step 5. Click Apply or Sync at the bottom right. The transfer will begin.

How to Obtain More Music for Your MP3 Player
If you want to grow your local music collection, there are two simple ways. The first is purchasing songs. The second is downloading high-quality songs in bulk using Mediaio Audio Converter. Both methods give you proper local files like MP3 or FLAC. So you can transfer them to your MP3 player and listen without Wi-Fi. Here’s how they work.
Option 1. Purchase Songs
You can directly buy songs or full albums from platforms like Amazon, Bandcamp, or Qobuz, just like buying CDs earlier, except now you receive downloadable files with proper metadata already included.
You can choose the platform based on the quality you need.
- Amazon is good for simple MP3 files.
- Bandcamp or Qobuz deliver high-resolution formats like FLAC or WAV.
The only downside is this: you will have to pay for each song (US$1.49 to US$2) or album (US$14 to US$20). So the cost will add up with every purchase. And high-resolution formats will cost more depending on quality.
Here is how to purchase and download songs on Amazon:
Step 1. Head over to Amazon.com and search for a song or album.
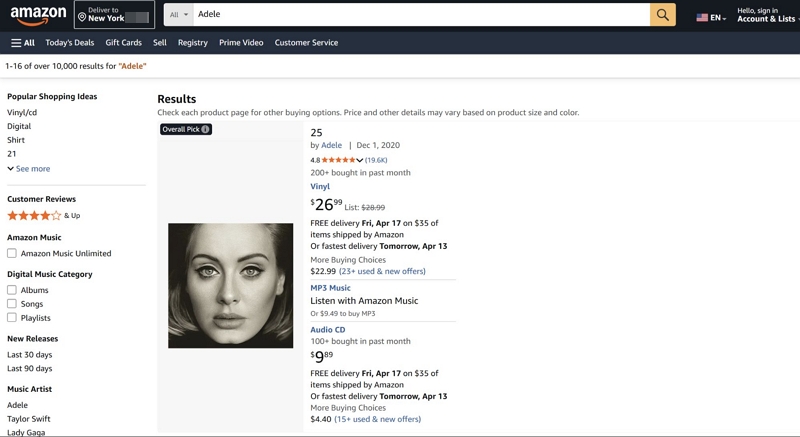
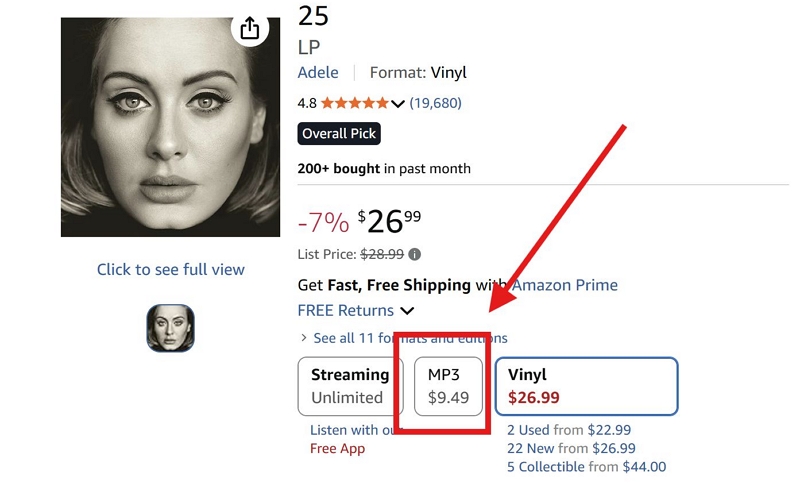
Step 2. Open the result. Look at the purchase options. You will usually see Streaming, Vinyl, or MP3 — select MP3.
Step 3. Complete the purchase. The files will be downloaded to your computer.
The files will come properly tagged with artist, album, and artwork. So once you transfer them to your MP3 player, everything will appear clean and organized without extra effort.
Option 2. Convert Songs to MP3
Purchasing each song or album can add up the cost very quickly.
So if you really want a practical way to get all your favorite songs at once, it makes more sense to export them from platforms where your playlists and liked songs already exist, like Spotify, Amazon Music, Apple Music, Pandora, and YouTube Music. Mediaio Audio Converter is built for this purpose.
Mediaio lets you log into your music platform, access your library, and export everything as local files like MP3 or FLAC. Once the files are on your computer, you can transfer them to your MP3 player or DAP easily.
Besides albums and songs, Mediaio allows you to export your existing playlists that can’t be bought from Amazon. You can even pull audiobooks and podcasts from supported platforms. The conversion runs at 30X speed and batch downloads are supported, so getting everything together does not take much time.
Conclusion
That’s the whole picture. The best way to move music onto your MP3 player depends on how big your library is and the hardware you have (cable, adapter). Of course, the USB method is the most convenient one.
We’ve also shown you how to build your offline library. Buying songs is one way, but it can get expensive over time. A more practical option is Mediaio Audio Converter that lets you bring in entire playlists from Spotify, Apple Music, and YouTube Music and keep them with you offline.