

Looking to export your carefully crafted GarageBand songs to MP3 on iPhone but can't find the option? That's because GarageBand on iPhone does not have a direct MP3 export feature. Don't worry. In this guide, we will show you how to save your GarageBand file as MP3 on both iPhone and Mac. If you also want to export your project as an MP4, we have got that covered too.
How to Export GarageBand Files to MP3 on iPhone/iPad
On iOS, MP3 isn’t part of the native export option in the GarageBand app. So, you’ll need to use a third-party method. The good news: you can handle the entire conversion right from your iPhone by using a free, browser-based tool. Here’s the full process, step by step.
Step 1. Export Songs from GarageBand as M4A
You can normally save your GarageBand project in one of its supported formats, like M4A (AAC). Whether you’re using GarageBand on iPhone or iPad, the layout is nearly identical, so you can follow the same steps across both devices.
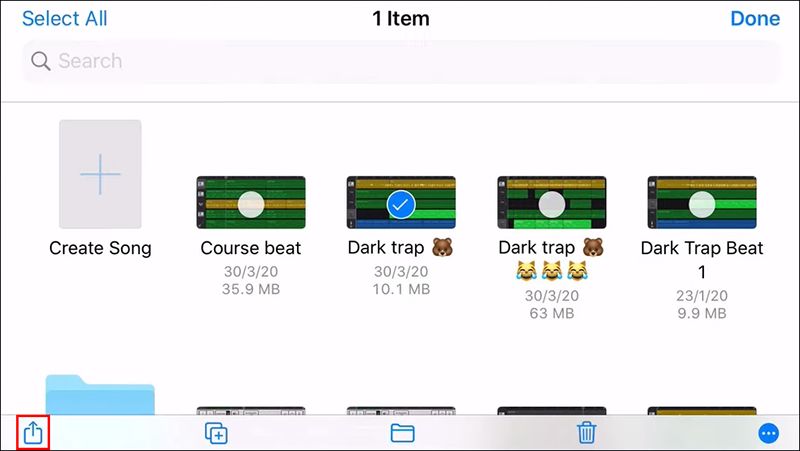
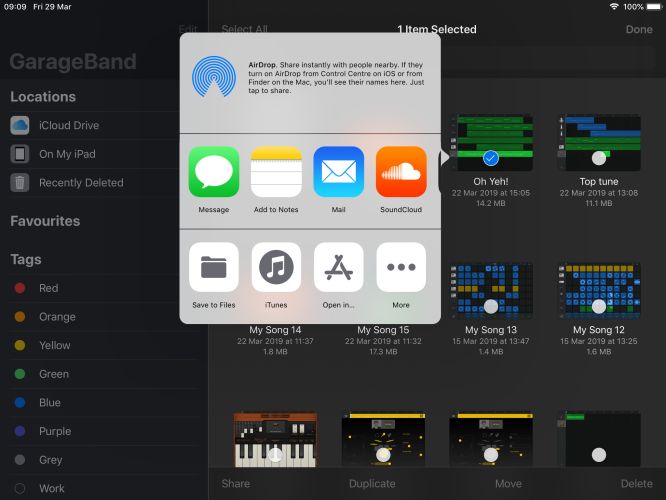
1. Press and hold the audio file you want to export in the GarageBand app. You’ll see a small tick appear on the thumbnail. A tray of options will glide into view near the bottom screen.
2. From the lower-left corner, tap the Share icon.
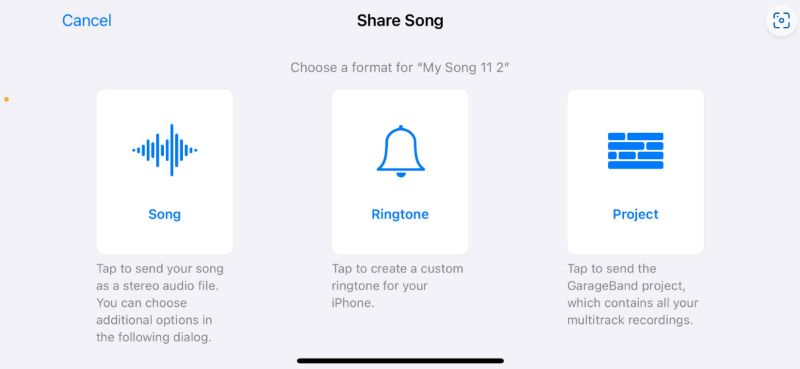
3. On the next screen, choose Song as your sharing format.
Note: Project (keeps all editable data for others to continue) and Ringtone (saves only a 30–40 second snippet) are for different use cases. So, just hit Song.
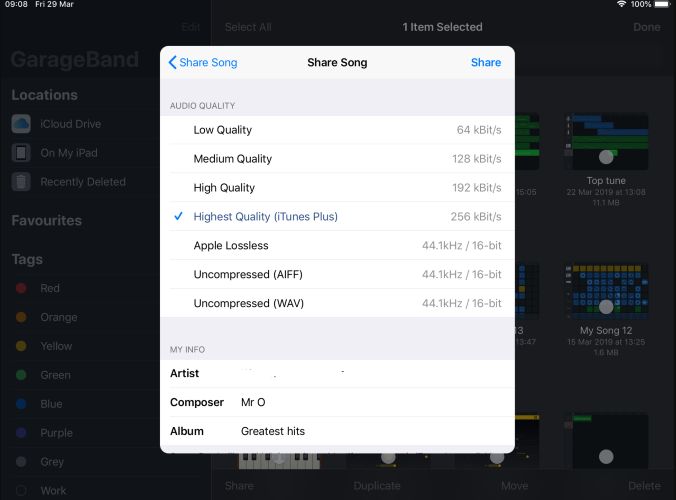
4. Next, you’ll be asked to choose the audio quality. GarageBand doesn’t label it as M4A (AAC), but options like Low, Medium, High, and Highest correspond to that format.
Before finishing, scroll to the My Info section to adjust fields like artist name, composer, and album to better organize your file.
5. Hit Share. Simply choose Save to Files to save it on iPhone as an M4A (AAC) file.
Where Are GarageBand Audio Files on iPhone/iPad?
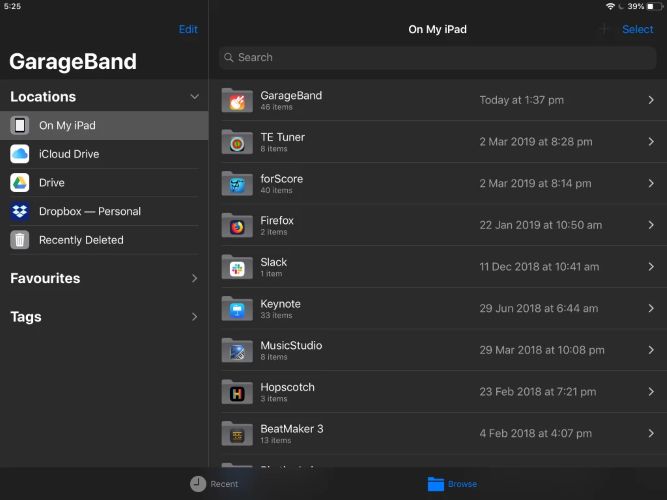
When you select Save to Files for the first time, a new folder named GarageBand is automatically created in the Files app.
To find it: open the Files app, tap Browse and go to On My iPhone or On My iPad.
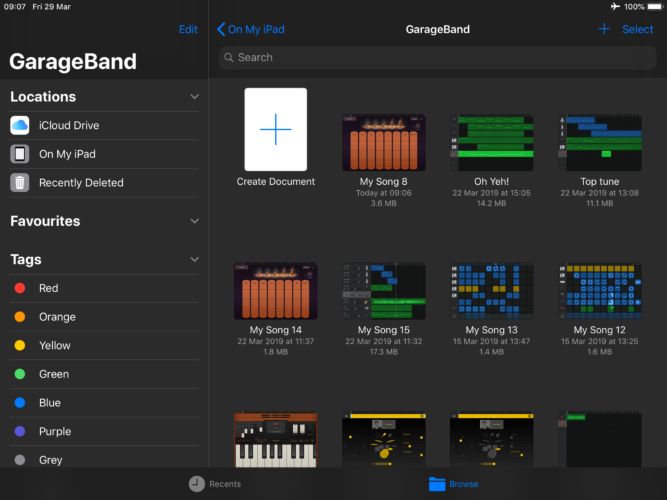
You’ll find the exported .m4a song inside the folder. And you can move it to a different folder if needed, just like with any regular file in the Files.
Step 2. Convert GarageBand M4A to MP3
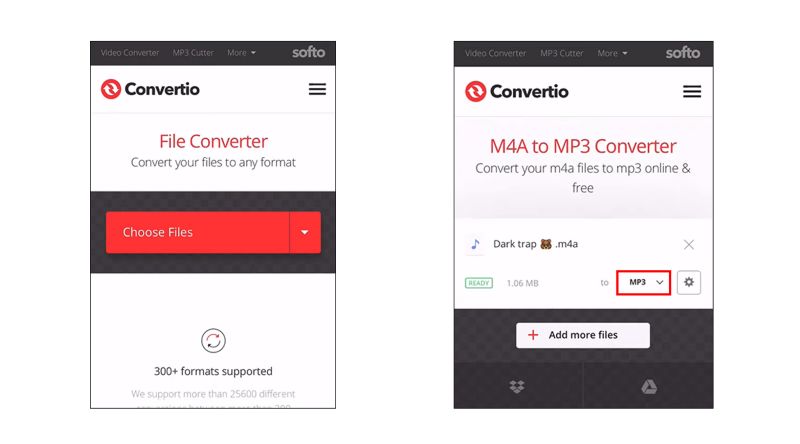
Now that you’ve exported your .m4a file from GarageBand, converting it to MP3 is actually pretty simple. Just use an online tool like Convertio. Here’s exactly how to do it:
1. Go to convertio.co using Chrome or Firefox.
2. Tap the big red Choose Files button on its main interface. When the file picker opens: go to Browse > On My iPhone > GarageBand. And select the song you exported earlier.
3. Once your file uploads, use the drop-down to set the output as MP3.
4. Hit Convert. Let the process complete. It’s usually quick for files under 10 MB.
5. Tap Download once the file is ready.
How to Export GarageBand Files to MP3 on Mac
On macOS, MP3 is also available as an export option right alongside the usual formats like AAC (M4A), WAV, and AIFF. There are also four bitrate presets to choose for MP3: the Low Quality (64 kbps), Medium Quality (128 kbps), High Quality (192 kbps), and Highest Quality, which is 256 kbps.
It’s also important to note that MP3 as an export option is only available on GarageBand 10.0.2 or later. So if you don’t see the MP3 option, simply update the app.
Steps to Save GarageBand Songs as MP3 on Mac
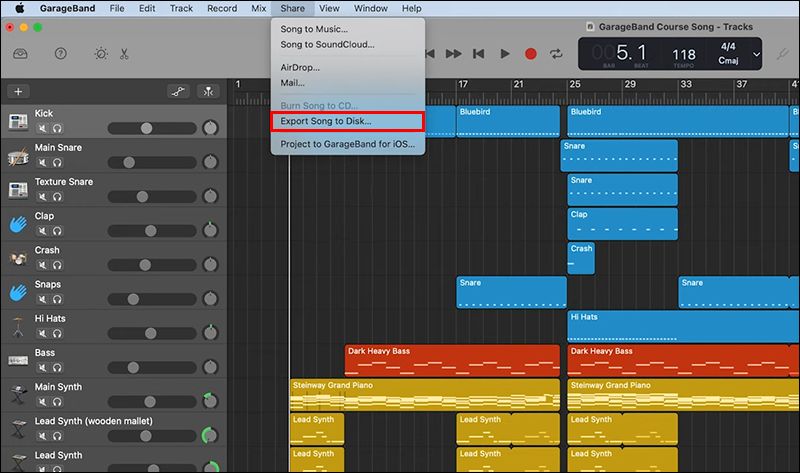
Step 1. Open your GarageBand project. Click Share from the menu options. Then, choose Export Song to Disk to initiate the bounce.
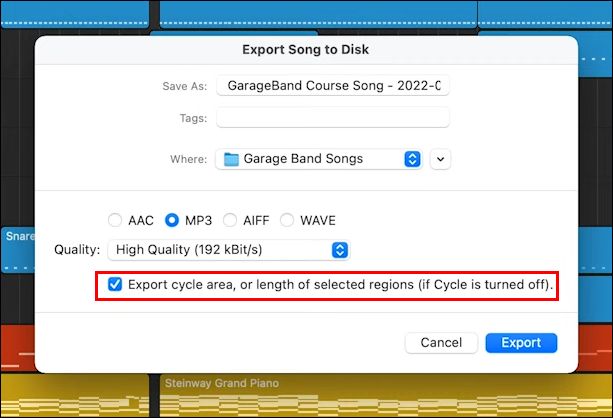
Step 2. The Export Song to Disk pop-up window will appear. From there:
- Set the output format as MP3.
- Then, choose the bitrate using the drop-down (like High Quality at 192 kbps).
Note: make sure the checkbox assigned to the Export cycle area, or length of selected regions option is checked. If not, only a few seconds of the song will be exported.
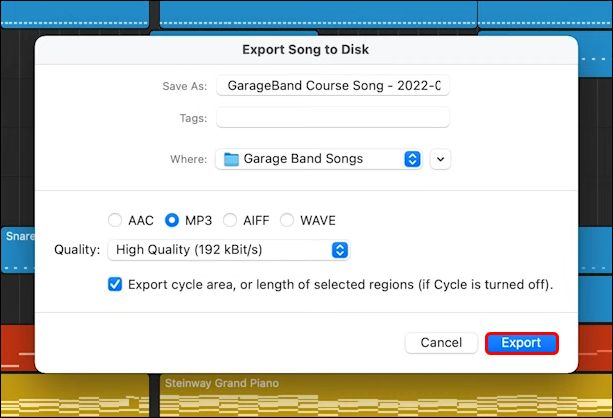
Step 3. Click Export. That’s it. Your MP3 version of your GarageBand track is saved right to your Mac.
Where Are GarageBand Audio Files on Mac?
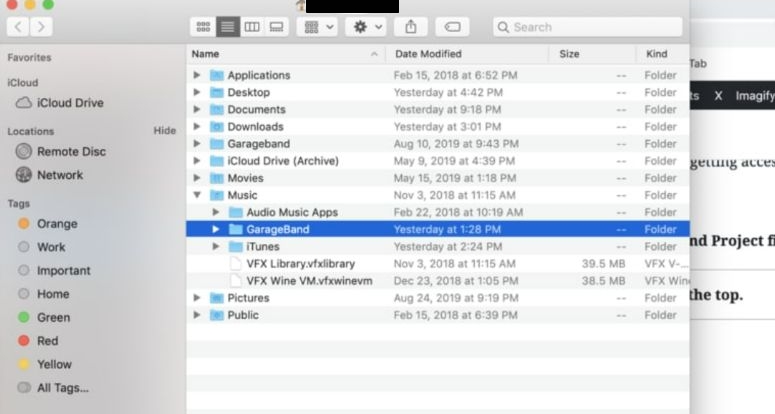
GarageBand on the macOS actually lets you choose where you want to save a project. The Where drop-down lets you pick the location for saving the MP3 file.
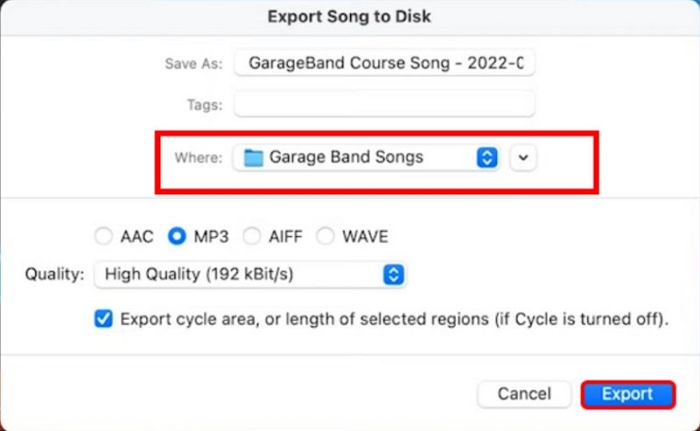
Later on, when you want the MP3, simply head to that folder. Your GarageBand export will be sitting right there.
How to Save GarageBand as MP4
GarageBand is an audio-only app. And even on macOS, it doesn’t offer built-in support for exporting a project as video (MP4). You can’t even attach any kind of visual, like a still image, waveform, or subtitles to your song. That said, this does not mean converting your GarageBand project to MP4 is impossible. You can first export your GarageBand project as an MP3 using the methods above, then use a tool like Eassiy Video Converter Ultimate to convert the MP3 to MP4.
Eassiy does more than just convert your GarageBand MP3 to MP4. It also lets you polish your file before exporting. You can add a cover image, adjust the output format, or merge multiple GarageBand MP3 files into a single MP4. Once the export is done, you can continue refining the video by adding lyrics as subtitles or trimming unwanted sections. If needed, you can also apply a watermark to the final output.
Step 1. Download, install and launch Eassiy Video Converter Ultimate on your computer. Click Add Files to import your GarageBand MP3.
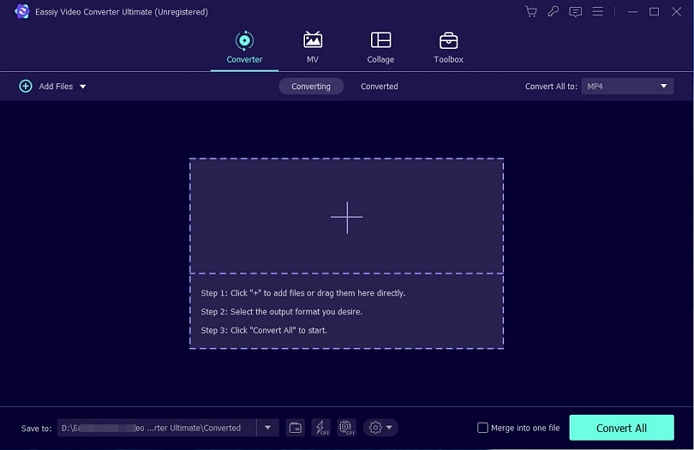
Step 2. On the right side, MP4 should already be selected as the output format. Click Settings beneath it to adjust the video quality if needed.
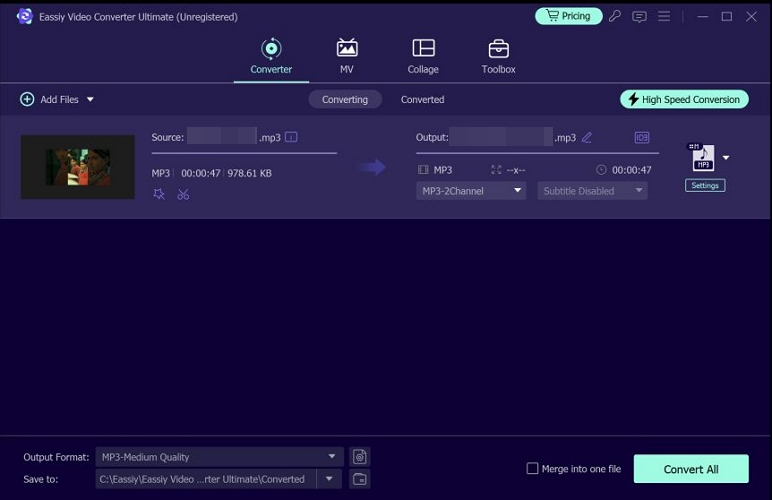
If you need to want to combine multiple GarageBand MP3s into one MP4 file, add the remaining files and enable Merge into one file.
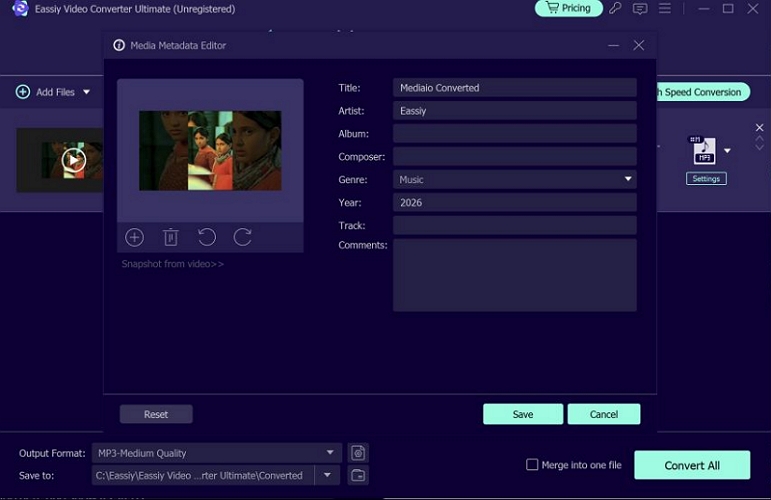
To add a cover image to the MP4, click the ID3 icon next to the output file name. Then, click the plus icon to add an image as the thumbnail. You can also edit other metadata fields, such as the title, artist, and composer.
Step 3. Click Convert All to start the export.
Conclusion
Even though GarageBand on iOS doesn’t offer a direct option to save a song as MP3, still we’ve discussed a reliable workaround. On macOS, thankfully, there is a direct MP3 option. As for MP4 exports, which are useful for sharing or creating audiovisual content, you can simply use Eassiy Video Converter Ultimate.