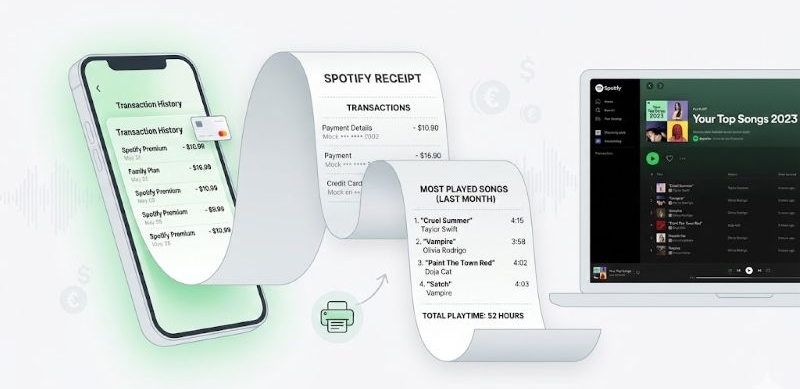
When people search for a “Spotify receipt”, they usually mean one of two things. One is the viral trend that turns your listening history into a fake store-style receipt for sharing online. The other is when you really want your billing history to see what Spotify actually charged you.
This guide covers both. It shows how to create a shareable music receipt using tools like Receiptify and a few alternatives and it also explains how to find your real Spotify payment and billing records.
How to Get Your Spotify Receipt for Most Played Songs
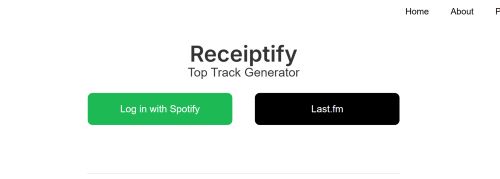
There are many sites that turn your Spotify listening history into a “receipt”, but the one most people actually use and trust is Receiptify.
Receiptify is a free browser-based third-party tool. There is no official mobile app for it. If you see an app claiming to be Receiptify, ignore it. The real tool works only through a web browser and uses Spotify’s official API for login and data access.
What it does is simple: it turns your Spotify listening data into a store-style receipt, where songs appear as items and track durations replace prices. It’s meant to be visual, minimal, and easy to share. You can:
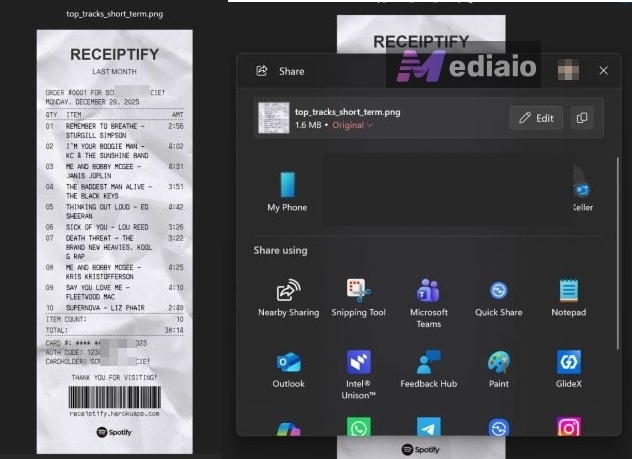
- Download the receipt as a PNG
- Share it like a normal image
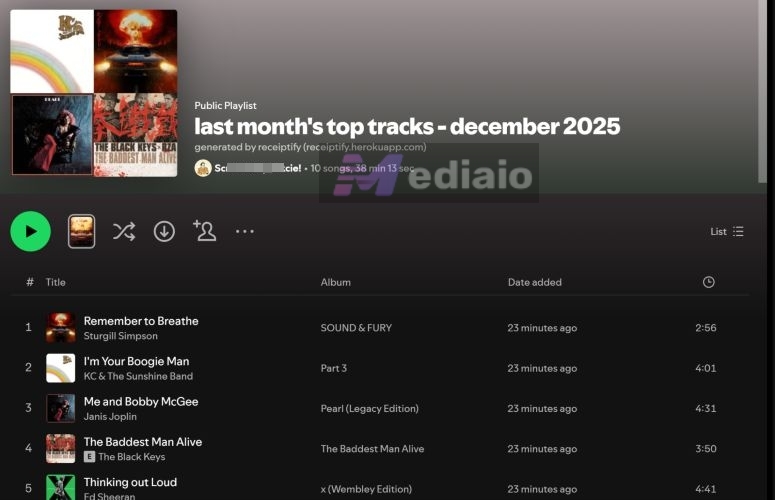
- Or even save the Top 10/Top 50 as a Spotify playlist
You can switch between Top Tracks, Top Artists, and other listening metrics. Some versions also show deeper stats in the background—things like popularity score, average track age, tempo, or mood, so you get a slightly different perspective on your music taste than Spotify Wrapped. You can generate receipts for last month, last 6 months or last year.
Design-wise, you don’t get much control and that’s kind of the point. There are:
- No color themes
- No layout changes
- Only two fonts: Classic or Internationally Compatible
Steps to Generate and Share Your Spotify Receipt
Step 1: Go to receiptify.herokuapp.com in your browser.
Step 2: Click Log in with Spotify button.
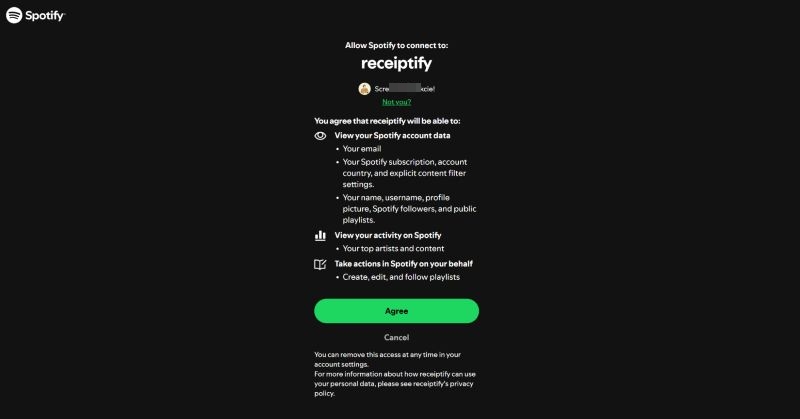
You’ll be redirected to Spotify’s official authorization page. Click Agree.
Step 3: After login, Receiptify automatically generates a receipt in a classic font with your top 10 songs from last month.
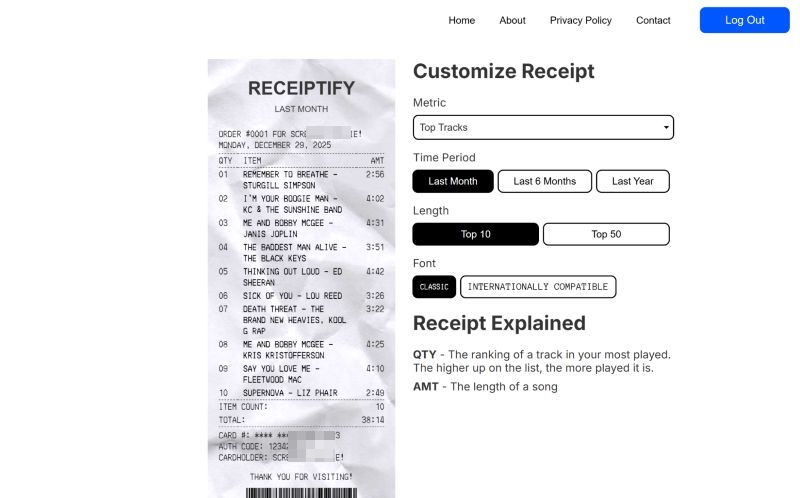
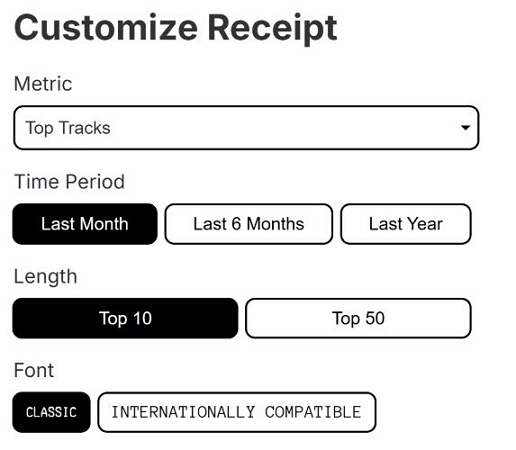
Step 4: On the customization panel, you can adjust:
- Metric: Top Tracks, Top Artists, etc.
- Time period: Last Month, Last 6 Months, Last Year
- Length: Top 10 or Top 50 (Top 10 works best for sharing—no zooming.)
- Font: Classic or Internationally Compatible
The preview updates instantly.
Step 5: Scroll down and you’ll see three options:
- Download image: save a PNG to your computer
- View in new tab: open full-size and save manually
- Save as playlist: create a Spotify playlist with those tracks
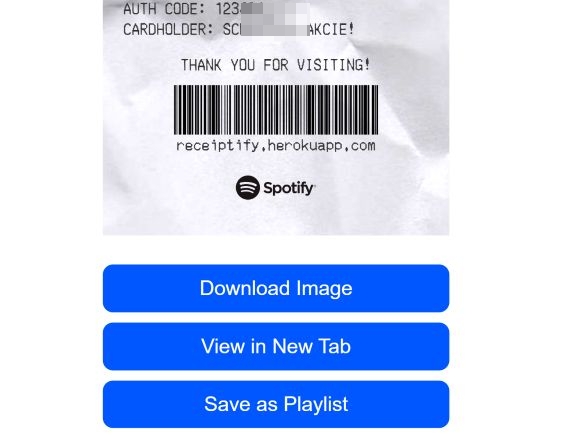
You can share the downloaded copy anywhere like a regular PNG image—Instagram, WhatsApp, X, Stories.
How to Save Your Most Played Spotify Songs
One of the coolest things about Receiptify, even with its very minimal approach, is that it gives you a Save as Playlist button. This button does exactly what it sounds like. It creates a proper Spotify playlist using the same tracks shown on your receipt.

And it behaves like any normal Spotify playlist. You can:
- rename it
- switch it from public to private
- reorder tracks
- add or remove songs later
If you want to make your “top-tracks” playlists offline, you can download it with premium. Here are the steps:
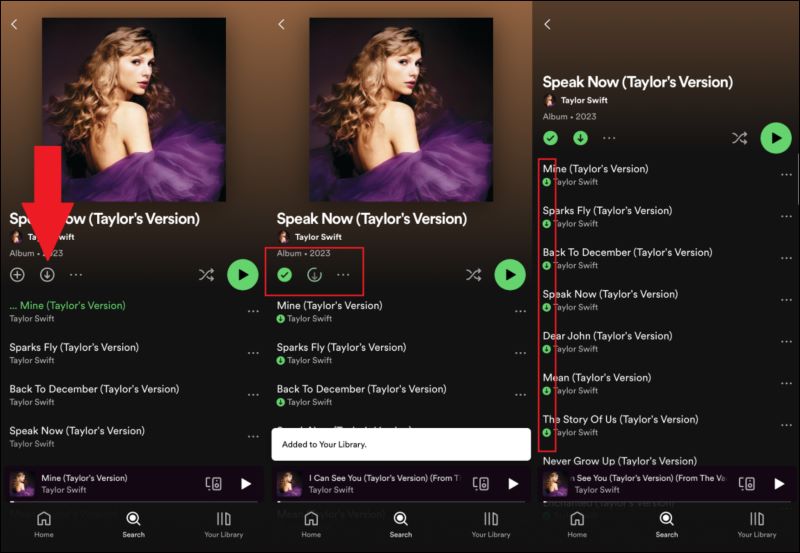
On Mobile
- Go to Your Library.
- Open the playlist.
- Click the Download button.
The playlist will become offline. You can play without an internet connection.
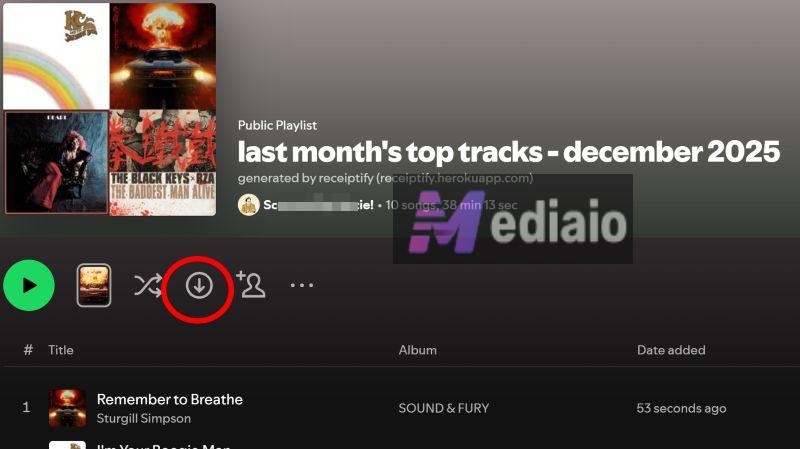
On Desktop
- Open the playlist on Spotify (Windows or macOS).
- Click the Download button in the playlist controls.
Spotify will save the full playlist. You’ll see a green download icon next to each track.
Spotify’s official downloads come with a few limits. You need Premium, downloads are locked inside the app, and they stop working if the subscription ends. You also can’t move those files to other devices or players. If you want to keep your Receiptify-generated top tracks as actual audio files, Mediaio Audio Converter is an alternative route.
Mediaio works differently. It lets you save your Spotify “top-tracks" playlist as local MP3, M4A, FLAC or other format files on your computer. You can move the downloaded songs to any device, play them in any music app, or store them as part of a personal library permanently.
Alternatives to Receiptify
There are no true alternatives to Receiptify.
Receiptify is built to do one very specific thing and it does it extremely well: generate a receipt-style, shareable snapshot of your Spotify listening history. That simplicity is also its biggest limitation:
- no visual analysis
- no taste judgment
- no depth beyond “top X”
- no personality or contrast
- no “why you listen like this” layer.
So the tools below are not replacements for Receiptify. Instead, they approach the same Spotify data from different angles— taste perception, genre depth, obscurity, visual breakdowns and often let you see more than just your top songs. Here’s the breakdown:
How to Get Your Spotify Receipt for Transactions
Sometimes you’re not looking for fun stats or listening history. You actually want to know how much Spotify charged you, when it charged you, and why. This usually comes up when:
- you see a bank SMS or card notification and want to confirm the charge
- Spotify Premium was canceled but a payment still appears
- you need proof of payment for reimbursement, bookkeeping, or family-plan tracking
- you simply want to check how much you’ve spent on Spotify over time
Spotify does keep a record of your payments. You can also download receipts from there, though Spotify only lists billing history for the last two years.
If you’ve paid through third-party methods like Apple Pay, Google Play, or App Store subscriptions, the receipt may not be listed in the Order History.
How to Check Your Spotify Payment Receipts
The web version works best for this.
Step 1. Log in to your Spotify account.
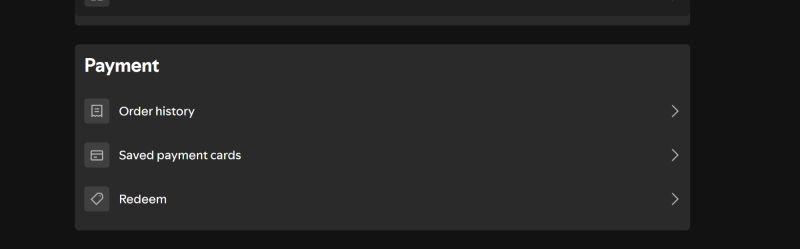
Step 2. Click your profile icon, then go to Payment.
Step 3. Select Order history. Here, you’ll see a list of recent charges, including:
- plan name
- date
- amount
- payment status (paid, failed, paused)
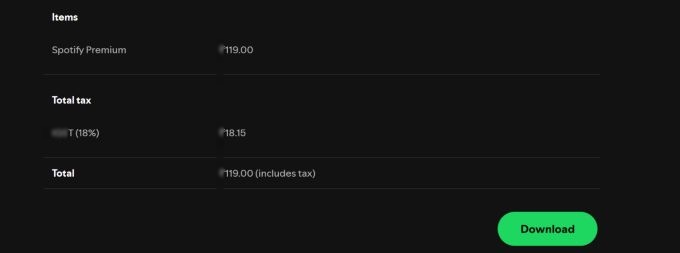
Step 4. Click More details next to any transaction. This opens the full breakdown and payment status.

Step 5. Click Download to save the receipt. You can keep it as a record or print it if needed.
Final Words
That is how you can turn your Spotify listening into a receipt with Receiptify. It gives you a quick, visual way to see what you actually play and share it with others. You also saw a few other tools that look at the same Spotify data in different ways.
To keep your Receiptify most-listened playlist offline, you can use Mediaio Audio Converter. It lets you save any Spotify playlist as MP3 files for offline playback or other personal use.