Adding a music player can really improve your Tumblr blog aesthetics. But after the death of Adobe Flash Player, most of the Tumblr music players you find now are outdated or simply don’t work. So we tested what actually still works.
In this guide, you’ll find five Tumblr music players that can get music playing on your Tumblr blog right now. Some require no coding. Others take a bit more setup. However, each one is proven to work. We lay out steps for each music player clearly, so you can set it up without trial and error.
5 Best Tumblr Music Players: Overview
Here’s a quick breakdown of all five Tumblr music players we have covered, comparing their technical requirements and what they’re best at. With the comparison, you can pick one without overthinking it.
 No code(copy–paste embed)
Effortless, takes minutes
• Simple, no-setup player
No code(copy–paste embed)
Effortless, takes minutes
• Simple, no-setup player • Works with YouTube/SoundCloud links
• Quick playlist on any blog
 Yes (paste + small edits)
Takes a bit of setup
• Clean, aesthetic designs
Yes (paste + small edits)
Takes a bit of setup
• Clean, aesthetic designs • Lightweight players
• Matches Tumblr themes well
 No code (visual builder)
Drag, drop and done
• No technical steps
No code (visual builder)
Drag, drop and done
• No technical steps • Built-in hosting
• Small blogs/low traffic use
 Yes (AI-generated code)
Some effort, full control
• Total design freedom
Yes (AI-generated code)
Some effort, full control
• Total design freedom • No external dependency
• Stable, long-term setup
 No code (iframe embed)
Just copy and place
• Fastest setup
No code (iframe embed)
Just copy and place
• Fastest setup • No hosting needed
• Quick sharing inside posts
5 Best Tumblr Music Players: Detailed Review
Now let’s break down each option. You’ll see how they works and exactly how to get the music player running on your Tumblr blog.
1. Wikplayer
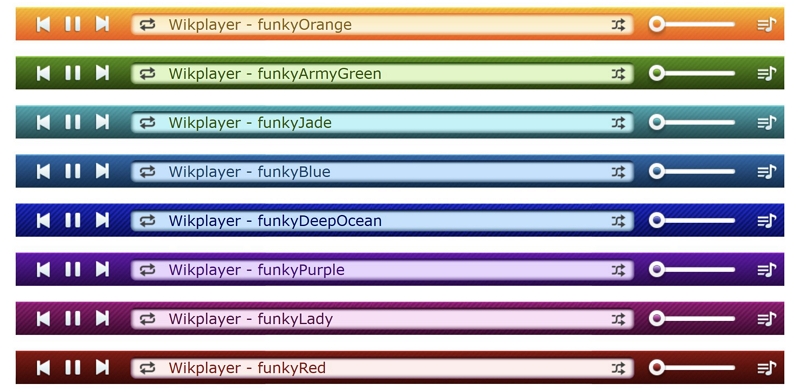
Wikplayer is one of the oldest Tumblr music players that still works today. That is exactly why it sits at the top. It still carries that old look and does not try to be modern. If your goal is simple — just play your music on your blog without dealing with hosting or code, Wikplayer will get the job done.
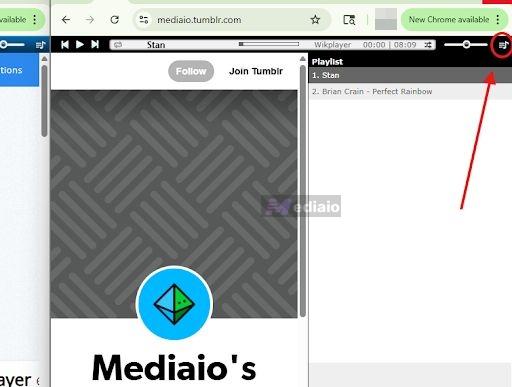
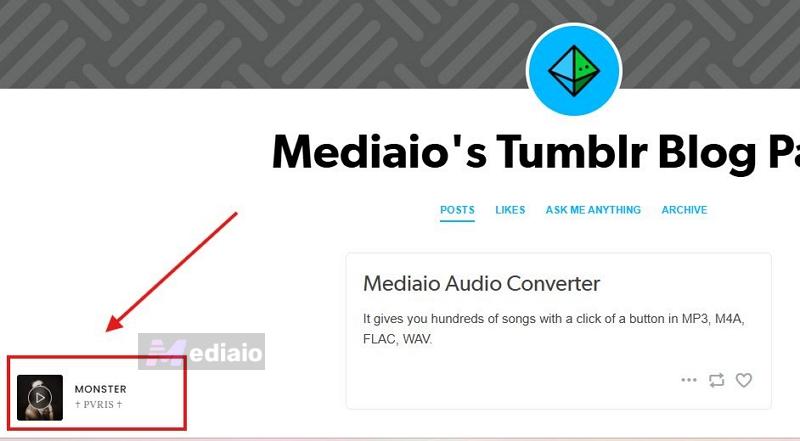
One thing to keep in mind is the layout. The player will appear as a bar at the top or bottom of your blog. There is no floating widget or deep design control here.
What makes it different from the other methods in this list is how it handles music. You do not have to upload MP3 files or deal with direct links (though that option still exists). You can simply paste a YouTube or SoundCloud URL and build a playlist from that. This means you do not have to deal with hosting at all.
Steps to Use Wikplayer
Step 1. Open the Wikplayer website. The setup screen will show four tabs. Under Step 1: Mode, select Create New Playlist.

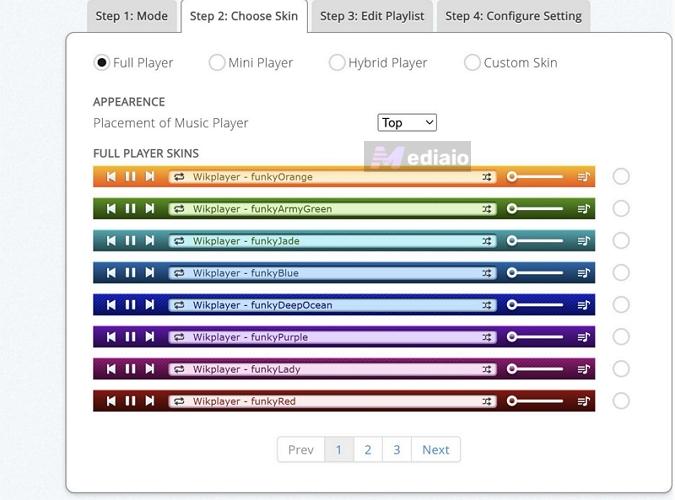
Step 2. Move into Step 2: Choose Skin. Pick the player type first — Full Player, Mini Player, Hybrid Player or Custom Skin.
Under Placement of Music Player, choose whether it should sit at the Top or Bottom.
Below that, select a skin style.
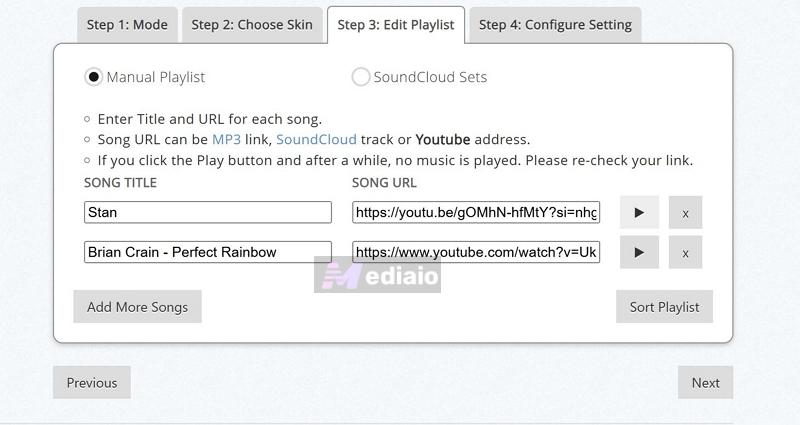
Step 3. Switch to Step 3: Edit Playlist. Keep Manual Playlist selected if you are adding songs yourself.
- Type the Song Title, then paste the Song URL next to it. This can be a YouTube link, SoundCloud track, or hosted MP3 file link.
- Use Add More Songs to continue building the playlist.
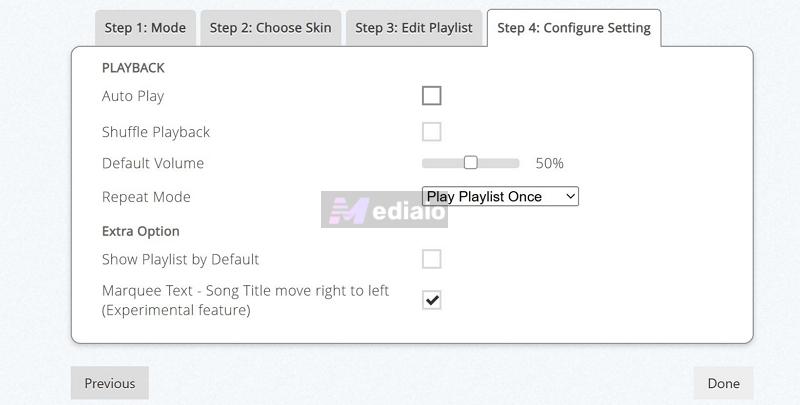
Step 4. Open Configure Setting. Adjust playback behavior here:
- You can turn Auto Play on or off, enable Shuffle Playback, and set the Default Volume (around 50% works well).
- Under Repeat Mode: choose whether to play once or loop the playlist.
Step 5. Once everything looks right, click Done.
Wikplayer will generate your embed code. Copy it.
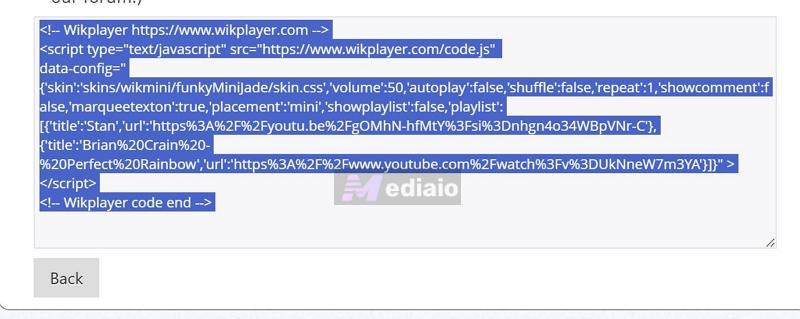
Now move to Tumblr.
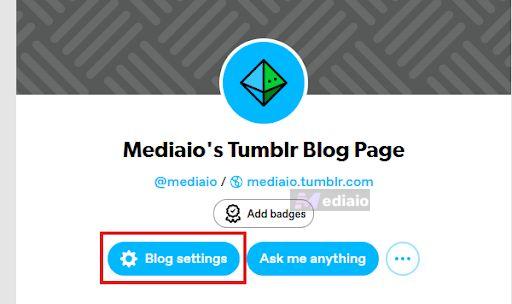
Step 6. Open your Tumblr account. Access your blog. From your blog page, select Blog settings.
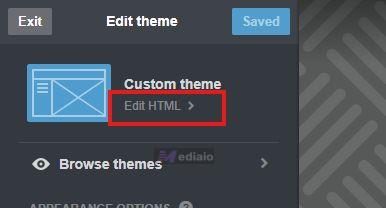
Step 7. Scroll to the Custom theme section. Click Edit theme.
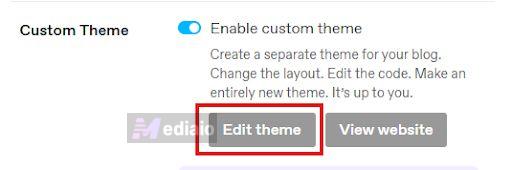
Then open Edit HTML.
Step 8. Press Ctrl + F while in the code editor itself. And search for <body or <body> tag.
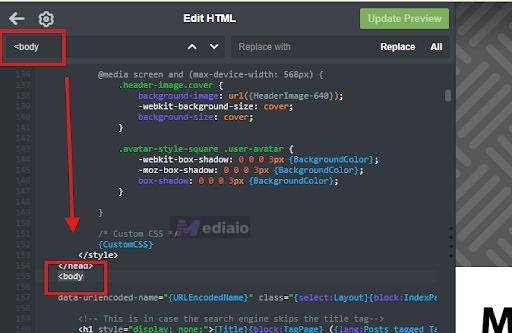
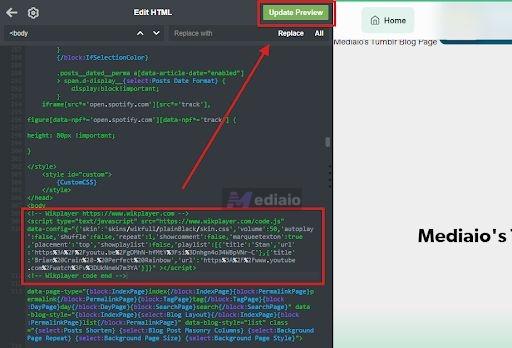
Step 9. Place your cursor just below that <body> or <body line. Paste the Wikplayer code there.
Step 10. Apply the changes using Update Preview, then click Save.
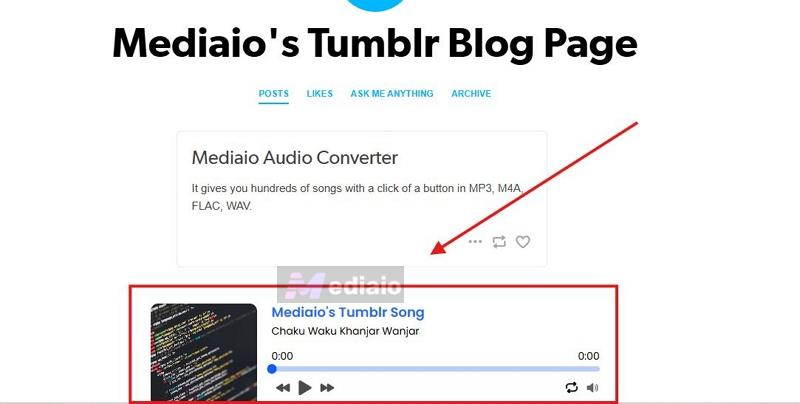
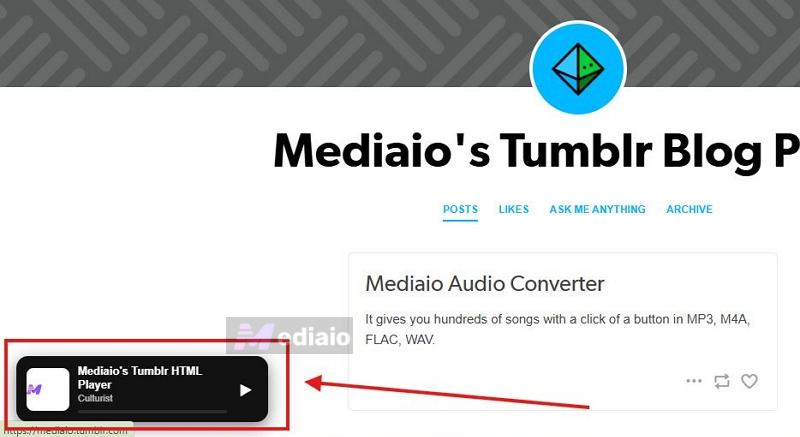
Go to your blog. You’ll see the WikPlayer music player.
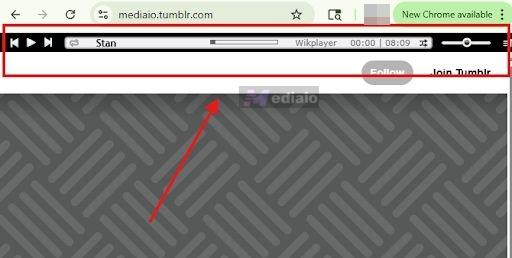
Viewers can click the playlist icon to switch between tracks. Otherwise, it will play according to your settings.
Our Thoughts
Wikplayer is not modern, and it doesn’t try to be. Its defining trait is being purely functional and it has been doing that reliably for a long time.
As you have seen, it is easy to use and there is no HTML coding involved anywhere. Plus, there are no logins or paywalls of any kind. You open it, move through a few options, build your playlist, and get a ready-made code for your player. That’s it. So if your goal is simple — just attaching a music player and visitors can choose to play songs, Wikplayer works really well. It removes all kinds of friction.
The downside is obvious. It looks old and it is not just slightly outdated. It really feels like old internet. The skins are limited, the design is dated, and it can feel out of place on a modern Tumblr theme.
So the trade here is clear. You give up aesthetics for simplicity. If that works for you, it is something you can rely on comfortably.
2. Glenthemes Music Player
Glenthemes is well-known in the Tumblr community for designing well-optimized widgets. You will notice a consistent design language across everything made by the author — minimal, clean, and based on a black-and-white palette. That applies to their music players as well.
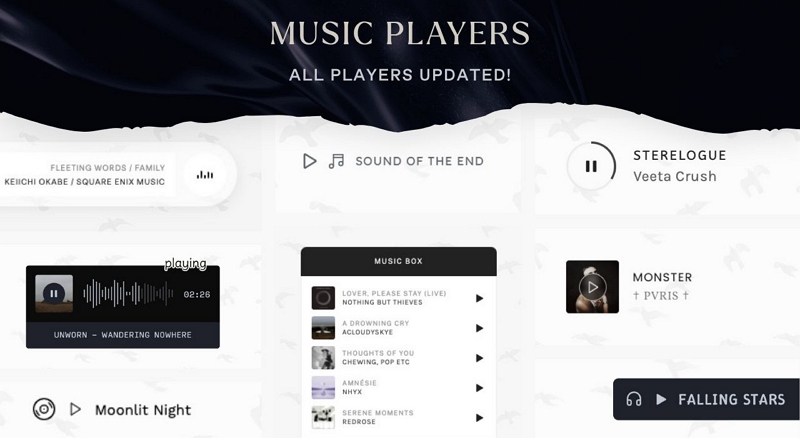
And yes, there are multiple music player styles available. Each one follows a slightly different visual idea while keeping the same lightweight structure. Here is a quick overview:
 Modern Slide-in Player
Animated music bars
Modern Slide-in Player
Animated music bars
 Ultra-Minimalist Bar
Simple music note icon
Ultra-Minimalist Bar
Simple music note icon
 Interactive Playlist Builder
Slide-up list on hover/click
Interactive Playlist Builder
Slide-up list on hover/click
 Old-School Throwback
Retro draggable scrubber
Old-School Throwback
Retro draggable scrubber
 Punchy Sliding Widget
Pushing headphones icon
Punchy Sliding Widget
Pushing headphones icon
 Classic Vinyl Aesthetic
Spinning vinyl icon
Classic Vinyl Aesthetic
Spinning vinyl icon
 Clean Geometric Loader
Circular progress ring
Clean Geometric Loader
Circular progress ring
 Album-Focused Player
Displays custom album images
Album-Focused Player
Displays custom album images
Most of these players are built to be jQuery-free. That makes them extremely lightweight and less likely to conflict with your Tumblr theme. So if you are using a custom or premium theme where other players break or clash with existing scripts, these usually work without issues.
Another thing to understand is how they are used. You are given a full block of HTML and CSS. Your job is simple — paste it and edit a few fields like song name and artist name.
One important requirement here is audio source. All of these players need direct audio files. You cannot use YouTube or Spotify links. You will need to host an MP3 file with a direct link and then place that link into the code provided by Glenthemes. Here is how the entire process works.
Step 1. Convert your music into MP3 using Mediaio Audio Converter
Not only Glenthemes, but most Tumblr music players require a direct MP3 file. Pasting a Spotify or YouTube link will not work. You will need a clean MP3 from your favourite music platform.
Mediaio Audio Converter helps with that. It lets you convert songs or playlists from Spotify, Apple Music, Amazon Music, YouTube Music, Pandora, etc., into MP3 in a few simple steps. And once you have the MP3 file, you can host it on platforms like Catbox for free, allowing any Tumblr music player to read the song and play on your blog without any issues.
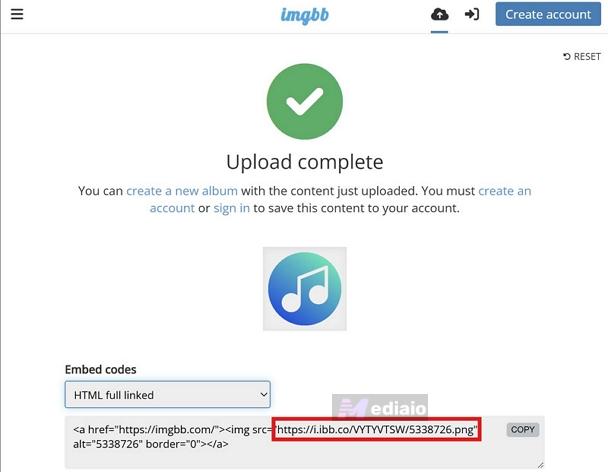
Step 2. Upload your MP3 files and get direct links
HTML players like Glenthemes or any other method covered later cannot read a web page or a file stored on your computer. They can only read a raw file. That means you must host your MP3 somewhere online and it must be a direct file link but not a share or preview page.
Follow these steps:
- Go to a free hosting site like Catbox.moe. You don’t have to sign-up on Catbox.moe, though registering is good because it lets you manage your files later.
- Click Choose File, select your MP3 and upload it.
- You will get a direct file link. Copy it and keep it safe.
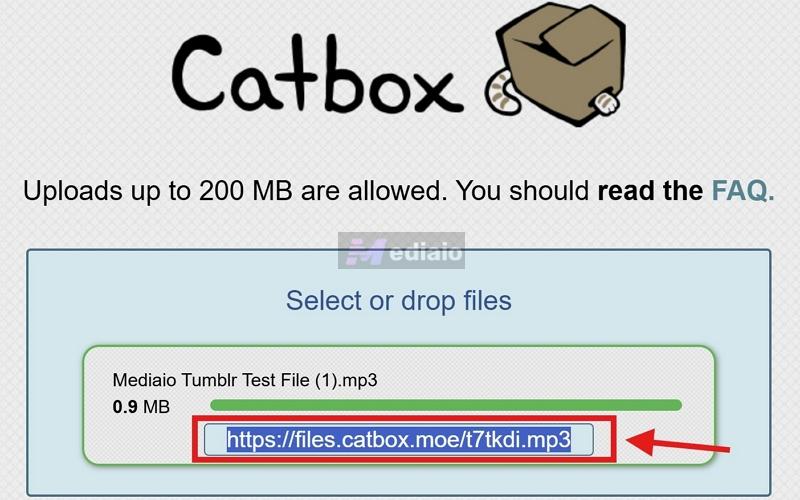
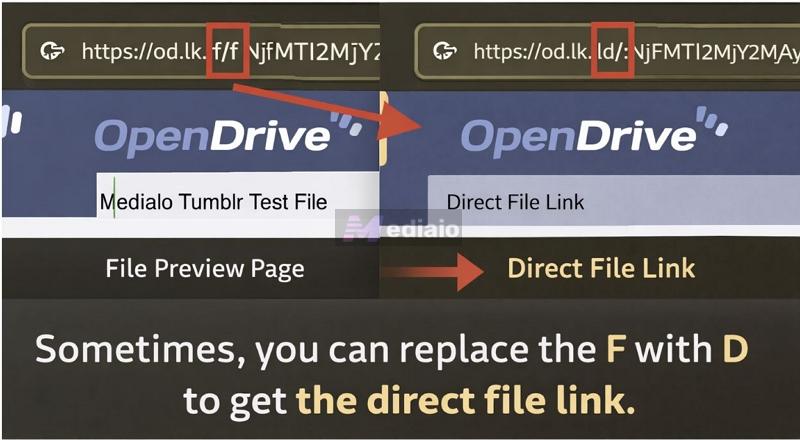
Tip: A direct file link starts with https:// and ends with .mp3 (or .wav, .ogg, etc.). So if you use other services like OpenDrive, make sure you have the direct file link (not shared page link). A quick way to identify you have the right link is to simply paste the URL in the browser — it will start downloading the song instantly, not open another page.
Now prepare your cover image:
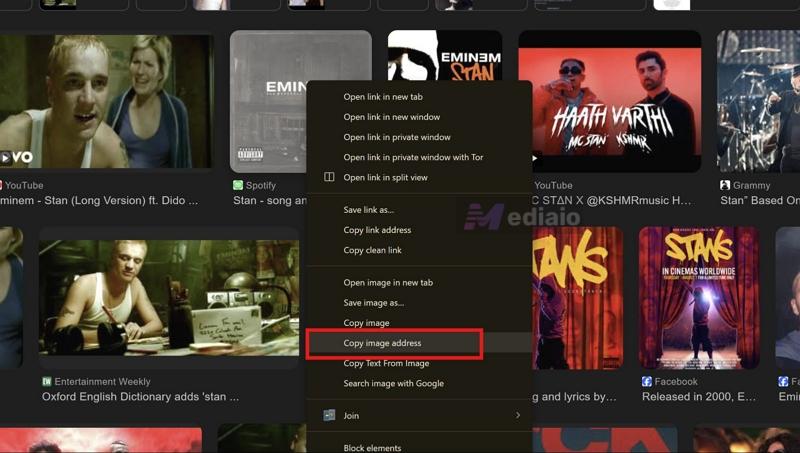
- Go to Unsplash or Pixabay and pick a cover image. Or search for the song name in Google Images, right-click on the cover image and select Copy image address.
Note: Mediaio Audio Converter preserves the original ID3 tags. And they will still show while playing the songs in your offline player. But HTML cannot display these tags automatically. So you need to add the song title, artist name, cover art, and other details manually.
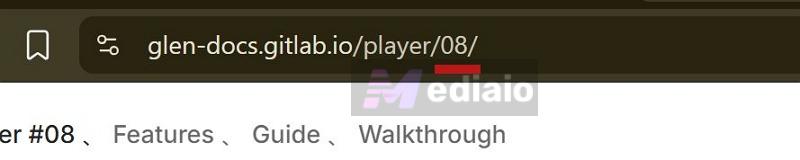
Step 3. Customize the Glenthemes code and prepare it
Now go to the Glenthemes player page: glen-docs.gitlab.io/player/03/. The number at the end (/03/) is the player version shown in the table above. To open a different player, simply replace 03 with another number, such as 01, 02, 04, 05, 06, 07, or 08.
After that:
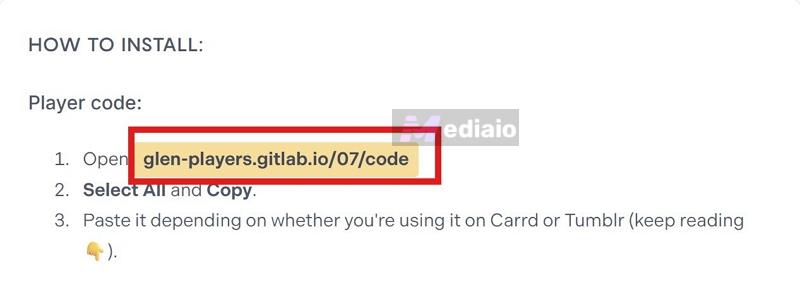
- Scroll down to the How to Install section. You will see a player code link. Click it. A new page will open with a full block of code.
- Select everything — press Ctrl + A (Cmd + A). Copy it.
- Paste this code into your Notepad first (you can paste it directly into Tumblr, but it is safer and easier to edit in Notepad first).
- Now edit the placeholders:
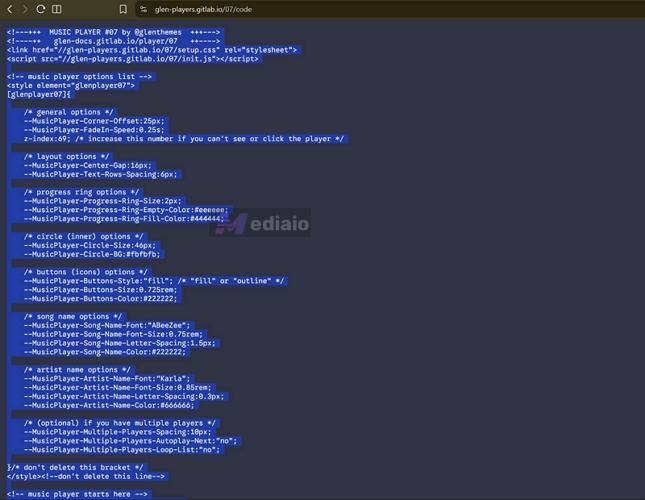
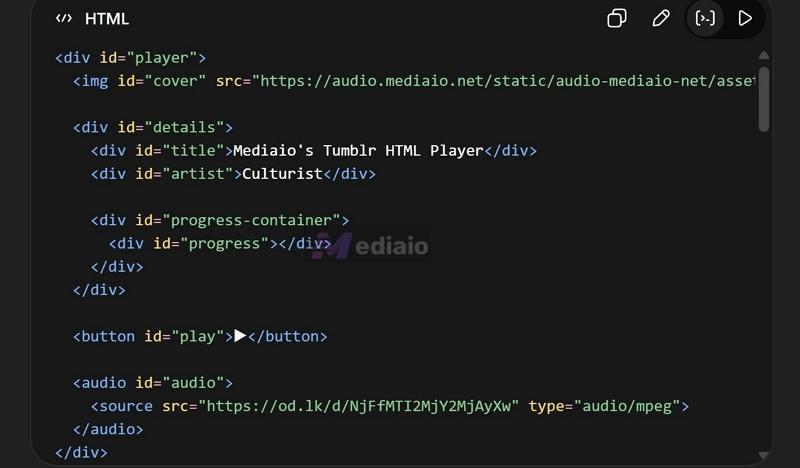
Find the line with the audio source: <audio src="https://....mp3"> Replace that full link with your Catbox MP3 link (from https to .mp3).

Find the album image line: <img album-image src="https://....png"> Replace that with your image link (from https to .jpg or .png).

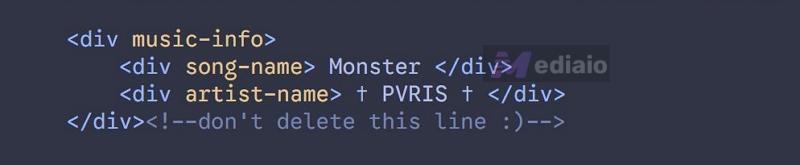
Find the text section: <div song-name>...</div> and <div artist-name>...</div> Replace these with your actual song name and artist name.
Once these are updated, your player code is ready.
Step 4. Publish the music player on your Tumblr theme
Now place the code on your blog.
- Copy the customized player code from your Notepad. Move to your Tumblr dashboard, open your blog, click Blog settings and choose Edit theme.
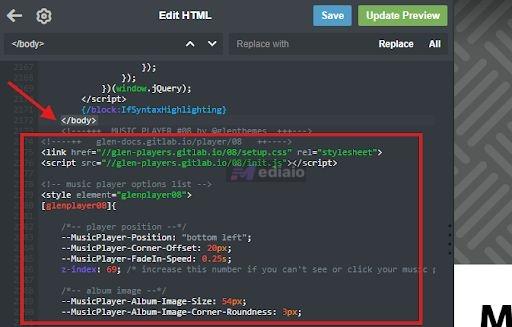
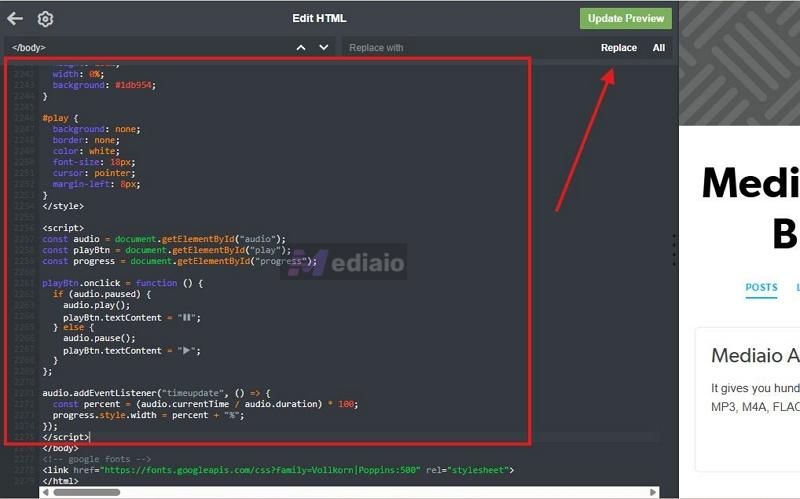
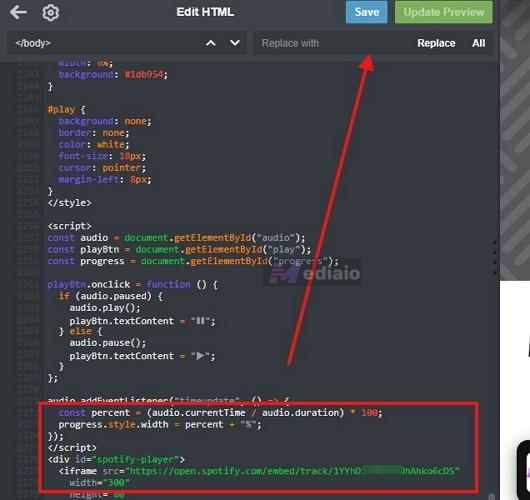
- Inside the theme editor, click Edit HTML. Press Ctrl + F and search for this exact tag: </body>.
- Paste your player code just above this </body> tag. Click Update preview and then Save.
That’s it. Open your Tumblr blog and you will see the music player placed exactly as designed.
Our Thoughts
Glenthemes really stands out because of its eight ready-made aesthetic choices. So there is always a player that fits exactly what you are trying to build. Each display also comes with its own customization options. You can adjust hex colors, spacing, border radius, and font size, so you are not stuck with just the default white and black. You can match it to your Tumblr theme properly.
Glenthemes also wins because of its jQuery-free setup. The player will load fast, feel smooth, and do not interfere with most Tumblr themes.
As for the manual setup — converting your favorite song, hosting the MP3 on a site like Catbox, or placing those links into the code, is something you will have to do with most music players out there. Still, it is not as simple as like Wikplayer or drag-and-drop builders, such as Common Ninja (covered next). So you will spend a few minutes setting things up.
But in return, you get a clean, fast, and fully free music player that does not require any payments.
3. CommonNinja’s Audio Player
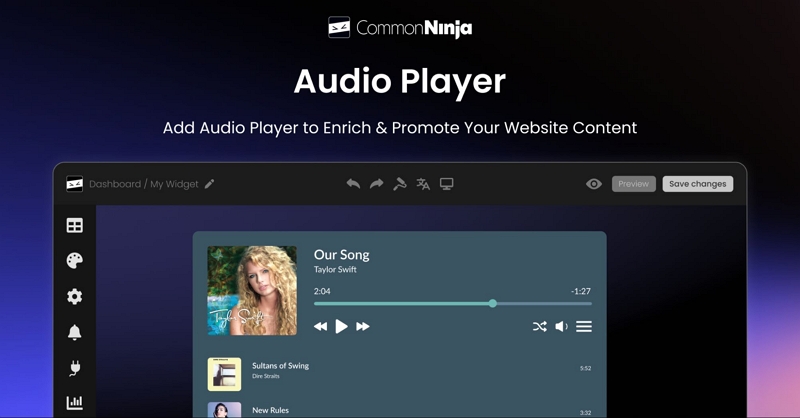
Common Ninja is a platform known for its no-code widgets. You can use its Audio Player widget to add music to your Tumblr blog without writing code.
It works very similar to Spotify or SoundCloud embeds. Those platforms give you an iframe code for their own tracks. In Common Ninja, you will have to generate that same kind of iframe code, but using your own audio file. The good thing is it also acts as a hosting site, so you can upload your own MP3 file, add your cover image, set a title, and it will turn everything into a ready-made audio player. That player will come with an embed code which you can directly paste into your Tumblr blog.
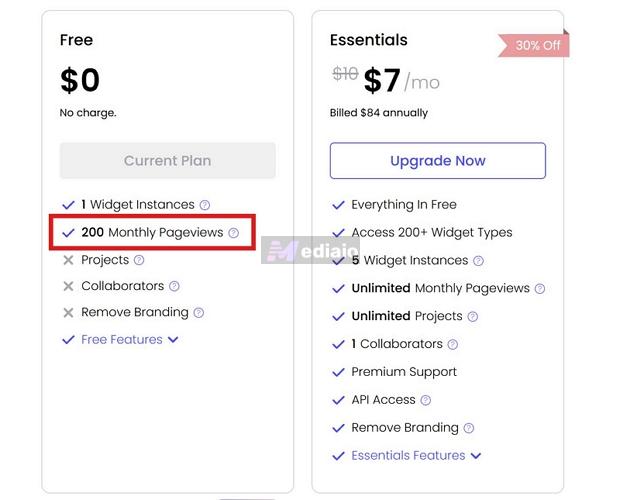
The Audio Player widget is available for free users, so you don’t have to pay anything to get started. The free plan also allows file uploads of up to 50 MB, which means you can host your MP3 songs directly on the platform. However, there are a few limitations: 200 Monthly Pageviews limit, Widget Instances, etc. Overall, this method is only practical if you upgrade to a paid plan, which starts at US$7 per month.
Steps to Use Common Ninja Audio Player
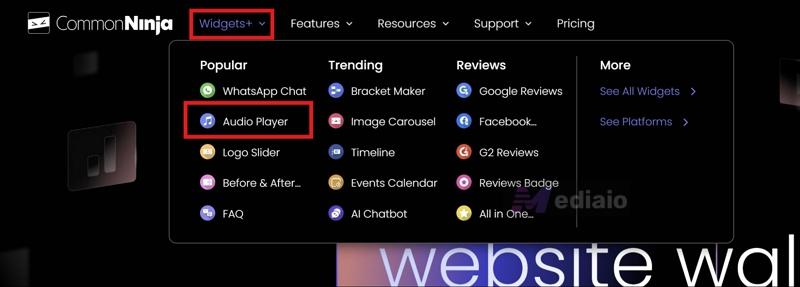
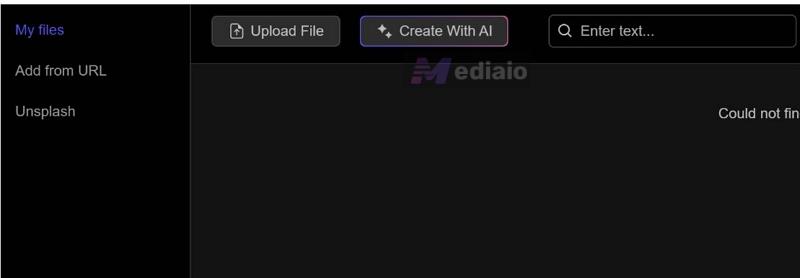
Step 1. Go to the Common Ninja website and log in. From the top menu, open Widgets and select Audio Player under the Popular section.
Step 2. Click Create Audio Player. The editor will open. You can see the live preview on the right.
Step 3. On the left, you’ll find the editor. First, remove the default tracks under the Tracks section.
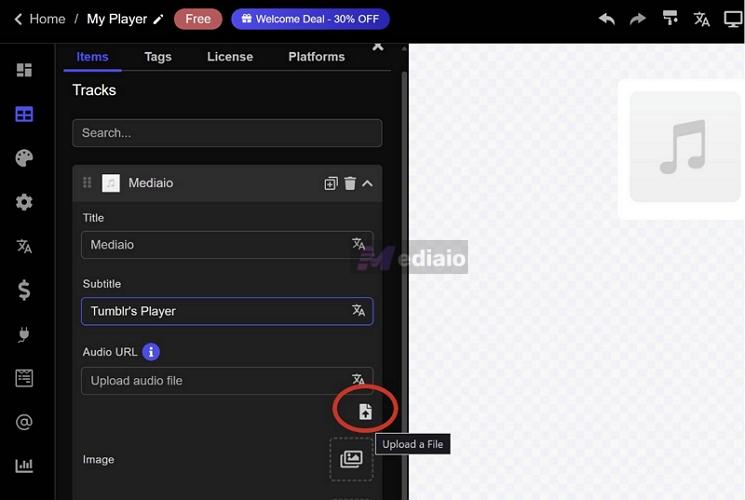
Step 4. Click + Add a Track. Expand the existing track card.
Step 5. Fill in the details:
- Enter the Title and Subtitle.
- Under Audio URL, either paste a direct file link or click the upload icon to add your MP3.
- Under Image, click the upload box to add cover art (upload, URL, Unsplash, or AI)
Step 6. Adjust anything else if needed from the same panel. The preview updates on the right side as you edit.
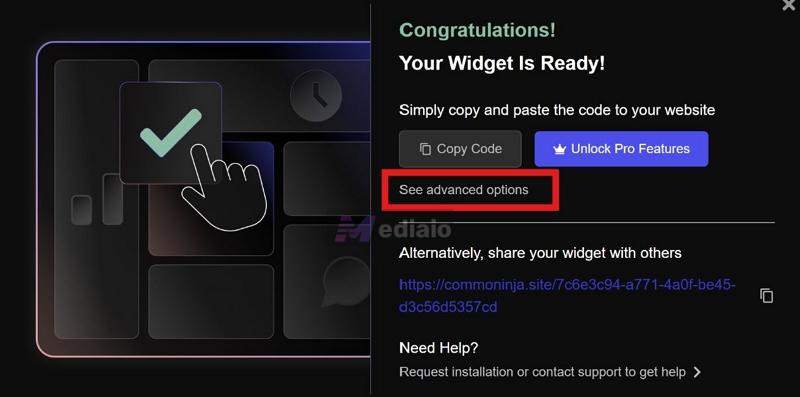
Step 7. Click Save Changes, then click Publish from the top right.

Step 8. After publishing, a pop-up appears. Click See advanced options.
Step 9. In the pop-up, open the Add to Website tab. Switch from Standard to iframe.
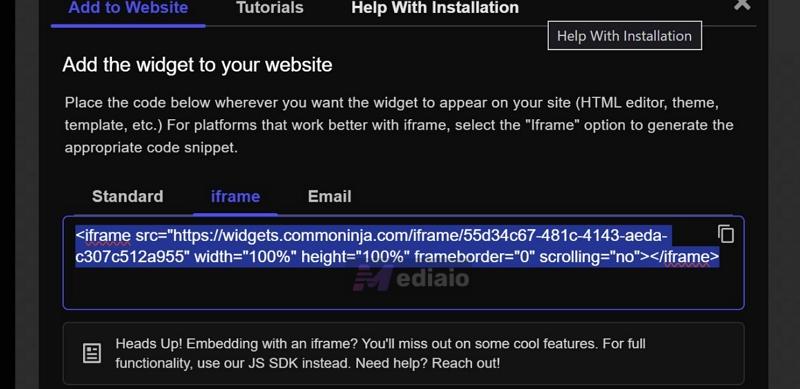
Step 10. Copy the iframe code exactly as shown.
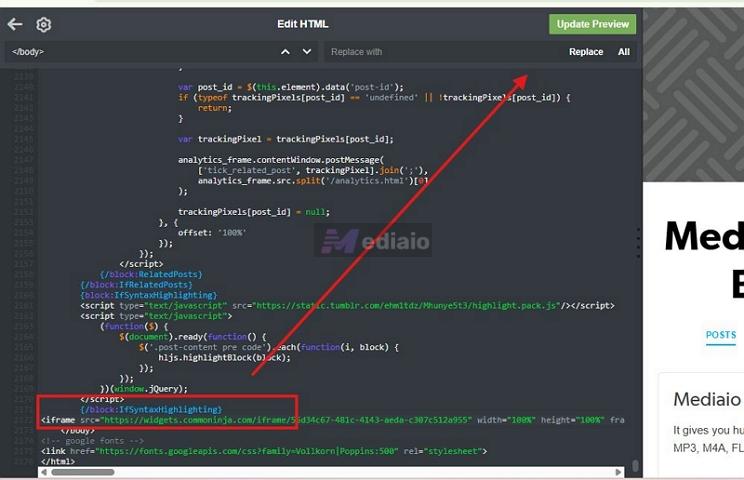
Step 11. Go to your Tumblr dashboard. Open Edit Theme, then Edit HTML.
Step 12. Find the </body> tag. Paste the iframe code just above it.
Step 13. Click Update Preview and then Save.
That’s it. The player will now appear on your Tumblr blog.
Our Thoughts
Common Ninja definitely offers one of the easiest ways to add a music player to your Tumblr blog theme. You do not have to deal with hosting or interact with code at all. You can directly upload your MP3s, set things up, and it will just work. The biggest advantage here is how much control you get, even without touching a line of code.
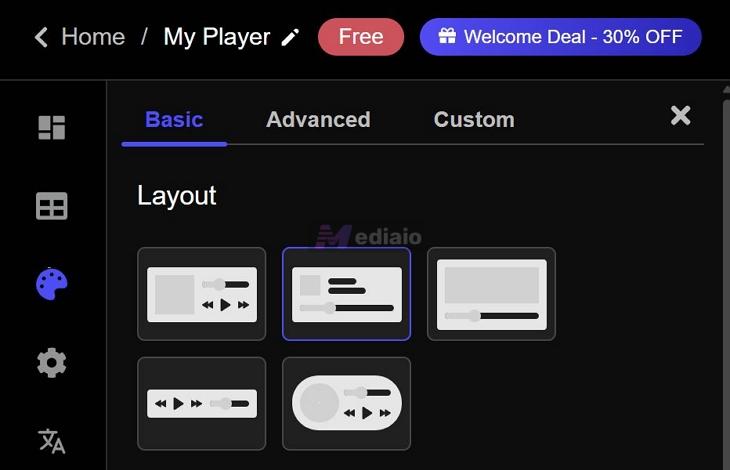
If you open its Look & Feel settings, you will find three categories:
- Basic: ready-made layouts and position controls like floating or inline, along with simple player skins using preset buttons.
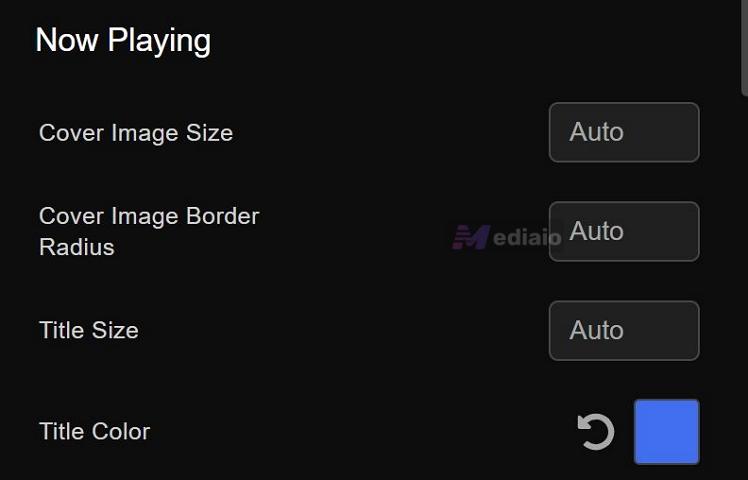
- Advanced: lets you adjust font style, background color, player width, border radius, spacing, and similar details.
- Custom: goes deeper, where you control how the player buttons look, how animations behave while music is playing, and how the entire widget sits on your page.

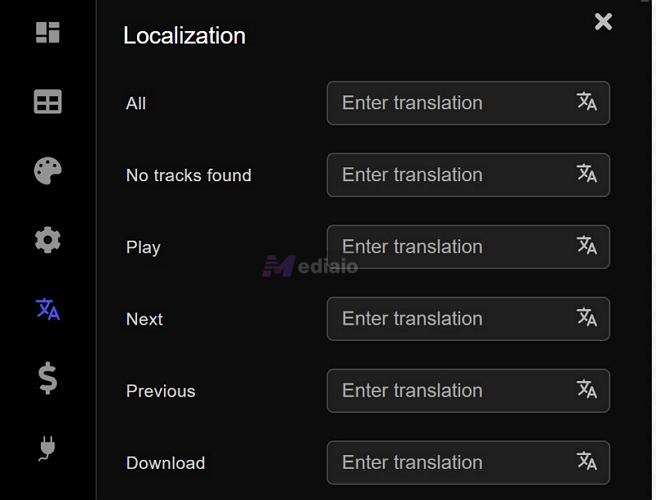
You can also control the behavior: set initial volume, enable repeat, and decide how the player runs. There is also a translation option, which means if someone visits your blog from France, options like play, next, or download will appear in French.
The only limitation is the free plan. Storage is capped (only 50 MB). Yes, it is enough for one or two MP3 tracks, but not for a full playlist. And an even bigger issue is the monthly page view limit. When creating the Audio Player widget with the free plan, it will only be accessible to the first 200 viewers. After that, it will lock itself, so others cannot interact with it.
If you are running a personal blog or a small audience, like family members, the free plan will work well. If your blog gets regular traffic, this quickly becomes restrictive without upgrading.
4. Build Your Own Tumblr Music Player (HTML Method)
You can simply go with the classic HTML setup — write your own code and build your own Tumblr music player.
The setup now is simpler too, with GPT there to help you. And all you will need is a hosted MP3 file and a cover image, which you can upload on any free hosting site without dealing with unnecessary logins or any paywalls.
Steps to Build Your Own Tumblr Music Player
Step 1. Make sure the song or playlist is hosted on the web.
- One of the best options for this is Catbox. Catbox is a free hosting site and requires no subscription or login. Copy its direct file link.
- Upload a cover image too. Copy its direct link (starts with https and ends with .jpg or.png).

Step 2. Go to ChatGPT. Write a simple prompt:
- Paste the copied file link and image link. Also type the song name and artist name.
- Mention how you want the Tumblr player to look and behave — floating widget, dark theme, play/pause button, progress bar, etc.
Ask GPT to give you the full HTML, CSS, and JavaScript in one ready-to-use code block.
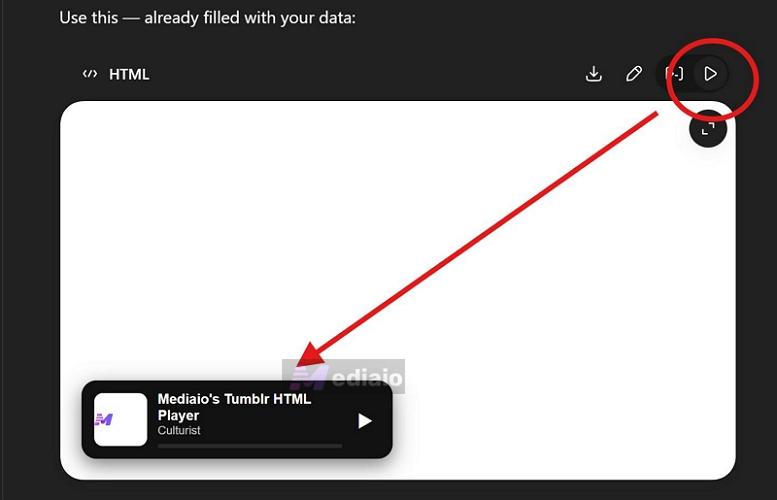
Step 3. It will generate a code block for you. Just use the Live Preview button (available as a feature in GPT, Gemini, Claude, etc.) to see how the music widget looks. You can ask GPT to modify it as needed.
Step 4. Go to your Tumblr dashboard. Open Blog Settings, click Edit Theme and open Edit HTML.
Step 5. Search for the </body> tag. Paste the GPT-generated player code just above this tag.
Step 6. Click Update Preview. Use the Save button to finalize the change.
Step 7. Open your Tumblr blog. You will see your custom music player placed exactly as you defined.
Our Thoughts
Historically, the biggest hurdle while making your own Tumblr music player was writing the HTML code. But now you can use any AI assistant to generate the exact code for you — you just have to describe what you want.
The real strength here is control. You can shape everything the way you want — background color, size, position, layout, and even behavior (autoplay, loop, single play, default volume). You’re not limited to presets like on WikPlayer.
Another big advantage is reliability. This method does not depend on external scripts or third-party widgets, so there are no random downtimes. The player will keep working regardless of where your blog is opened.
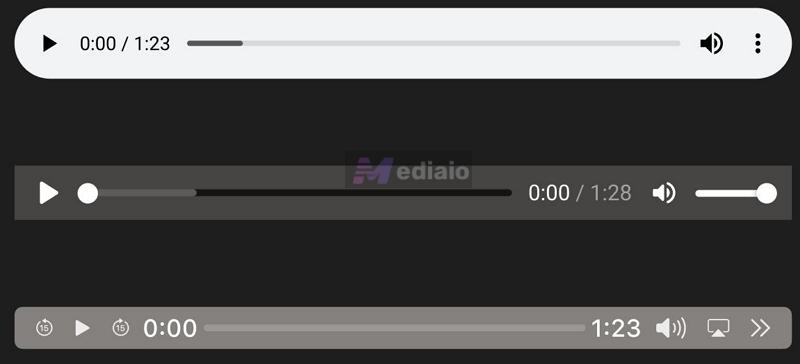
Keep in mind that the player can look a little different depending on where it’s being viewed. Chrome, Firefox, Safari — all handle the <audio> tag in their own way. Still, the changes are small. Buttons could look more rounded or a bit bigger and the font can vary, but everything still works the same.
But functionality-wise, it will always play, pause, and load properly. Your blog readers will not run into broken players or failed embeds.
5. SoundCloud/Spotify Embed
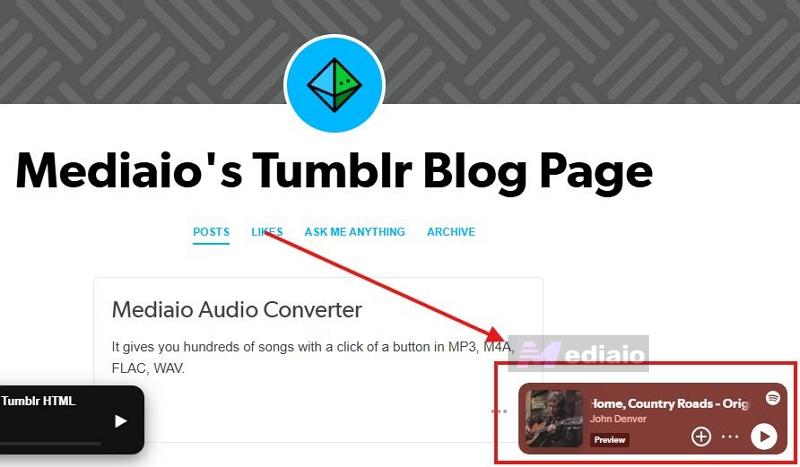
Both Spotify and SoundCloud work great inside Tumblr posts not your Tumblr blog. If you’re not sure how posts and blog themes differ, this guide explains it clearly: how Spotify embeds work on Tumblr.
Still, you can place them in your Tumblr theme as well since both provide ready-made embeds (iframe code). That means you can skip most of the manual setup you saw earlier. You just have to search for a song, grab the embed code, and drop it in, making the whole process much easier.
There are some important trade-offs here.
First of all, both embeds come with their own branding. The player will carry the platform’s controls and banner, so you are not getting a fully native Tumblr-style player.
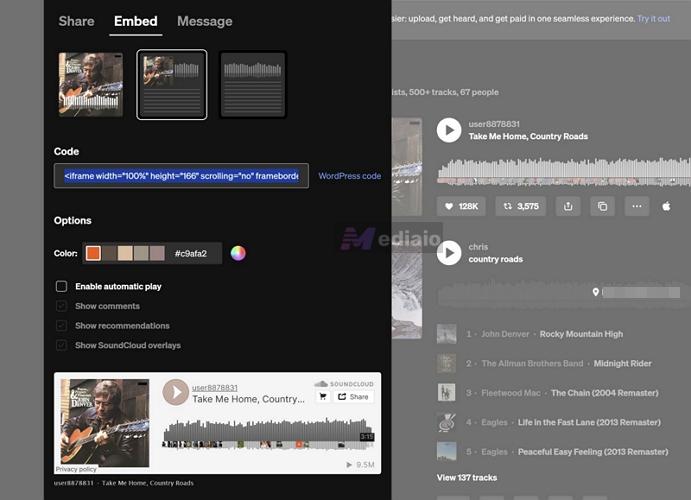
Now between the two, SoundCloud works better for this method. It allows full playback directly inside the embeds. So visitors can listen to the entire track without leaving your blog. You will also get a little control over how it looks and behaves. You can optimize things like autoplay, color, height, and even whether to show comments are available. Plus, there are different player sizes available.
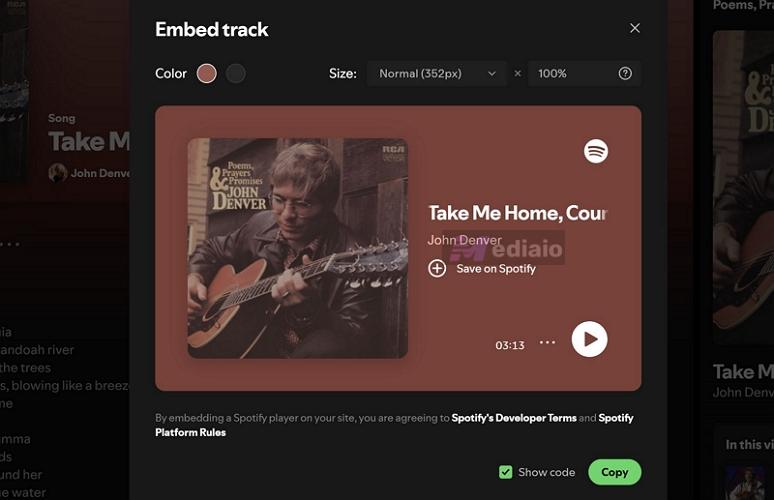
Spotify is more restrictive with its embeds. Playback is limited to around 30 seconds, and visitors must open Spotify to listen to the full track.
And the Spotify embed itself is also tighter. You cannot really customize it much unless you start modifying it separately, which is not ideal.
Still, both follow a similar process when it comes to getting the embed code. Here’s how the entire process looks.
Step 1. Copy your embed code
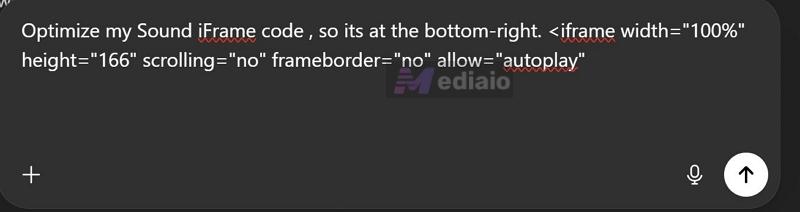
Step 2. Optimize the iframe code
Both iframe codes will work on their own. But if you paste them directly, they will sit awkwardly. So before placing them, run the code through GPT once.
Ask it to adjust spacing, width, and positioning. Keep the original embed intact. Just let it wrap or style it so it fits cleanly — top, bottom, or wherever you want it to sit on your page. This small step will make a noticeable difference.
Step 3. Place the optimized code to your Tumblr theme
Now move to your Tumblr theme.
- Go to https://tumblr.com/customize/YOURBLOGNAME Replace YOURBLOGNAME with your actual Tumblr blog here.
- Once the editor opens, look for Edit HTML. Inside the code panel, press Ctrl + F and search for </body> — make sure it includes the slash.
- Paste your optimized iframe code just above that line. Hit Update Preview and then click Save.
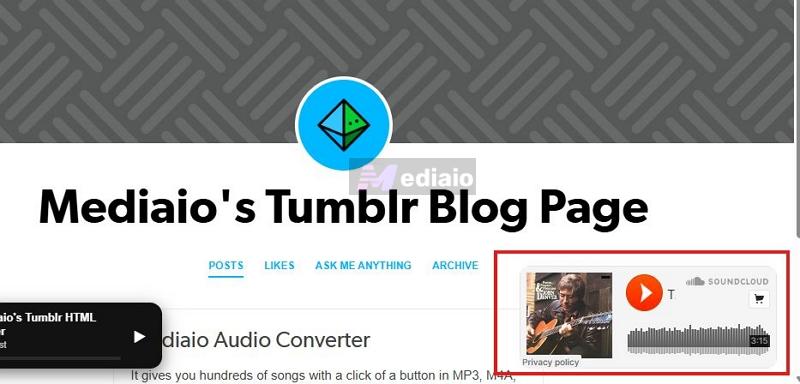
- Open your blog. The Spotify or SoundCloud player will now appear in place, aligned properly with your theme.
Our Thoughts
Embedding directly from Spotify or SoundCloud is easily the path of least resistance. You skip the setup, hosting, and code edits. But you are also playing by their rules.
Spotify’s 30-second preview can break the whole idea of a background music player. (Unless your visitors are already logged in with premium accounts.) That limitation shows up fast. SoundCloud is more flexible— at least the full playback works. The player still feels bulky though, and it carries its own look and controls, so it will not blend with your theme.
So it comes down to purpose. If you just want music to play on your blog and you do not care much about control or appearance, this method gets the job done quickly.
To Sum Up
You now have multiple ways to add a music player to your Tumblr blog, whether you want something quick like embeds, a no-code builder, or a fully custom player built your way.
One thing most of these Tumblr music players have in common is the need for a clean MP3 file. So you can use Mediaio Audio Converter. It lets you convert your favorite songs from Spotify, Apple Music, YouTube Music, Amazon Music and Pandora into MP3 in just a few clicks. Once you have the MP3 files, the process becomes simple. You can host them anywhere and your visitors can play them directly on your Tumblr blog.