Adding music to Google Slides from YouTube isn’t just about inserting a song. It’s about adding it in a way that actually fits your presentation.
Sometimes you want the music to play across every slide. Sometimes you want the song to play automatically. All of this is possible, but the result depends entirely on the method you choose. This guide breaks down the different ways to add music to Google Slides from YouTube. It also shows what each method actually lets you do, such as auto-play and trim, as well as the pros and cons of each way. That makes it easier to choose the option that fits how you plan to present.

How to Add Music to Google Slides from YouTube with Song URL
Google Slides lets you attach a YouTube link to any text, image, or shape. When you or someone clicks that element during a presentation, YouTube opens in a new browser tab and starts playing the music video there. As playback happens outside the slides, you’ll need to switch tabs to control it. That’s why this option is better suited for optional or reference content, not continuous background music.
This works well when:
- the content is meant to be viewed outside the slides
- the music or video is supportive, not essential
- the link appears at the end or as a reference
- you’re comfortable switching tabs while presenting
Steps to Add a YouTube Music Link in Google Slides
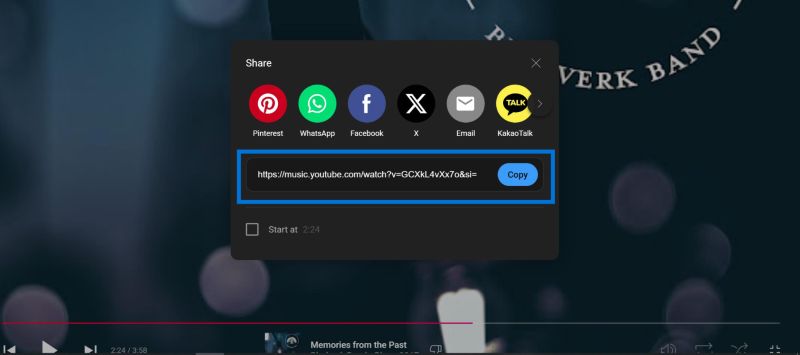
Step 1. Locate the YouTube Music song you want, click the 3-dot, choose the Share option and copy the link.
Step 2. Switch to your Google Slides presentation.
Step 3. Select the text, image, or shape that should act as the trigger for the music.
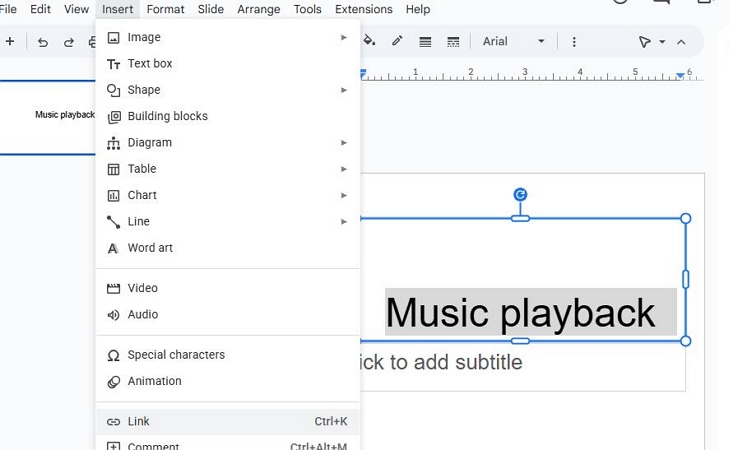
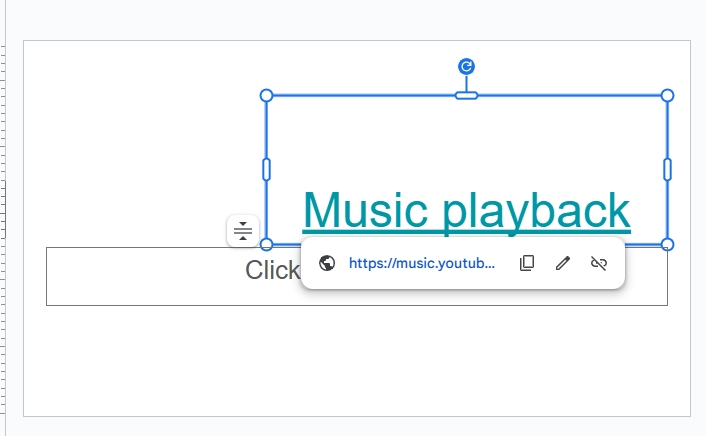
Step 4. Highlight the trigger using Insert > Link in the upper pane. Paste the YouTube Music song link and apply it.
When you’re presenting, clicking that element to open YouTube in a new browser tab and start playback. Stopping the music requires switching back to that tab and pausing it manually.
How to Add Music to Google Slides from YouTube via YouTube Video
You can choose this method when the video itself is allowed to exist on the slide. This works even when music is the main reason for adding it. For example:
- you want background music with a visual placeholder,
- you don’t mind occasional YouTube UI elements,
- or you’re presenting in an environment where interaction is expected.
Steps to Add YouTube Music to Google Slides via Video Embed
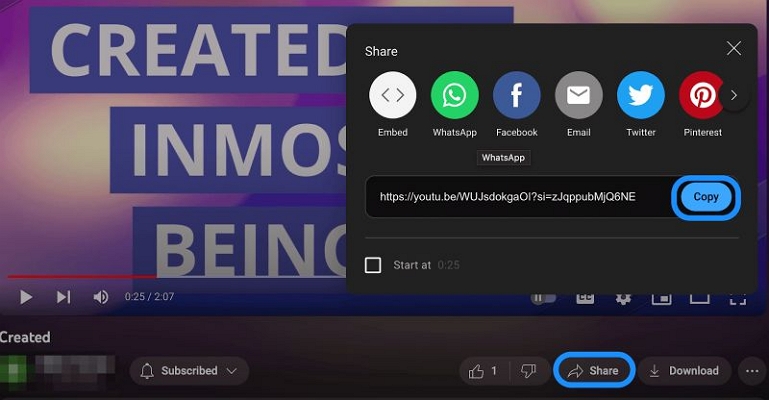
Step 1. Find the song video on YouTube or YouTube Music. Use the Share option and copy the link.
Step 2. Switch to your Google Slides presentation tab. Stay on the slide where the music should appear.
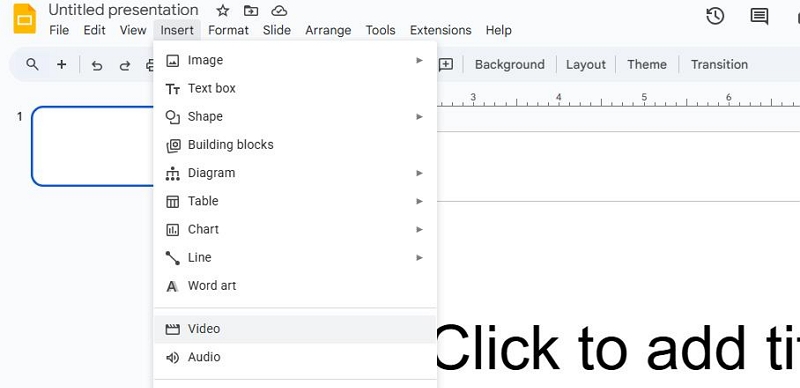
Step 3. Use the top menu, choose Insert, then select Video.
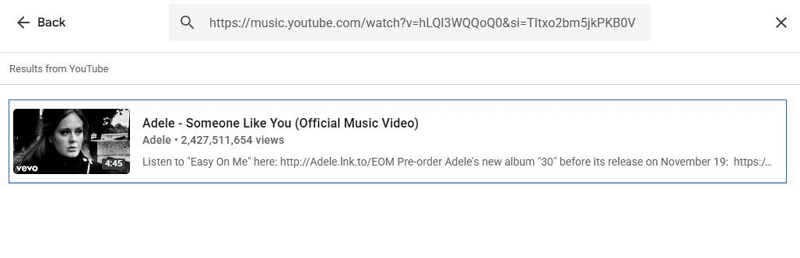
Step 4. Make sure you’re on the YouTube tab in the Insert video panel. Then, paste the YouTube URL into the search field at the top.
Step 5. Select the correct music video and confirm by choosing Insert.
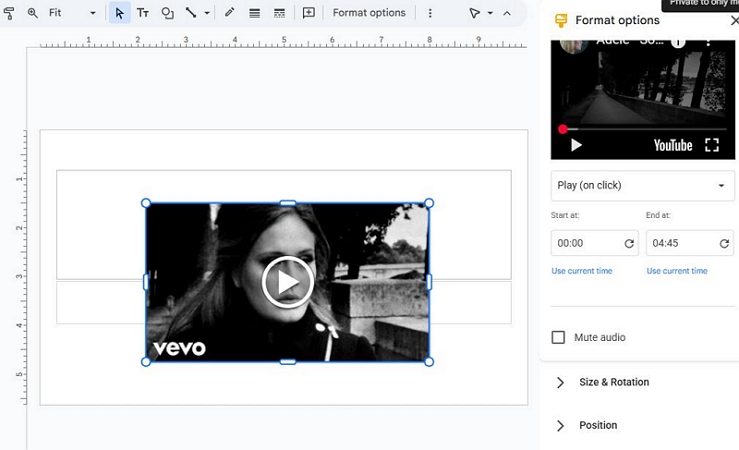
Step 6. Click the inserted video once to open the format options panel on the right. From here, you can:
- decide whether playback starts automatically or on click,
- set start and end timestamps to trim the audio range,
- mute the video if you want audio-only behavior,
- resize and reposition the video on the slide.
The video will play according to the settings you chose.
How to Add Music to Google Slides from YouTube Using Local Audio
Converting YouTube music and using it as local audio is the most reliable way to add music to Google Slides. You avoid live YouTube playback, so ads, buffering and random interruptions stop being part of the risk.
The process itself is straightforward. Turn the track into an MP3 or WAV with Mediaio Audio Converter. You can then upload it to Google Drive and add the audio straight into your slides. Before learning how the process works, let’s understand its deeply via its pros and cons first.
Step 1: Save YouTube Music Songs to MP3 or WAV Files
To use local audio in Google Slides, the music must first exist as a standard audio file. MP3 and WAV are both supported and both work cleanly with Slides. This is where Mediaio Audio Converter fits naturally into the process.
Mediaio lets you convert YouTube music, background themes, and instrumental tracks into MP3 or WAV without copying links or dealing with unstable online converters. It comes with a built-in YouTube Music player, meaning the entire music catalog—tracks, background themes, and saved items, is already accessible inside the app.
From that point, conversion is simple. You select the tracks you want and convert them directly into MP3 or WAV—formats that Google Drive accepts without any issues.
Step 2: Import Local YouTube Music Files into Google Drive
Mediaio saves converted YouTube Music tracks as MP3 or WAV directly to your Downloads folder, already organized. Here’s how to upload them to Google Drive:
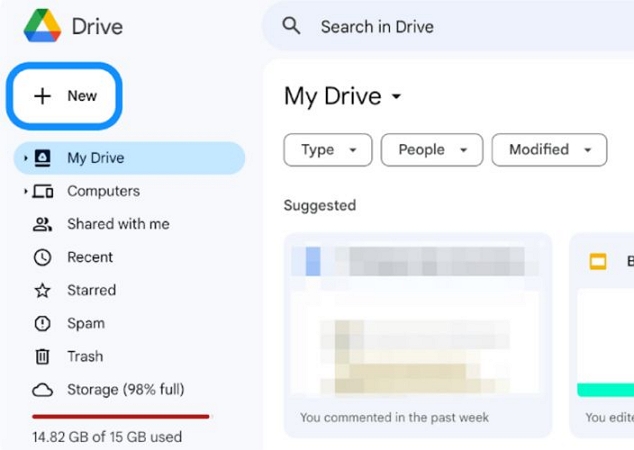
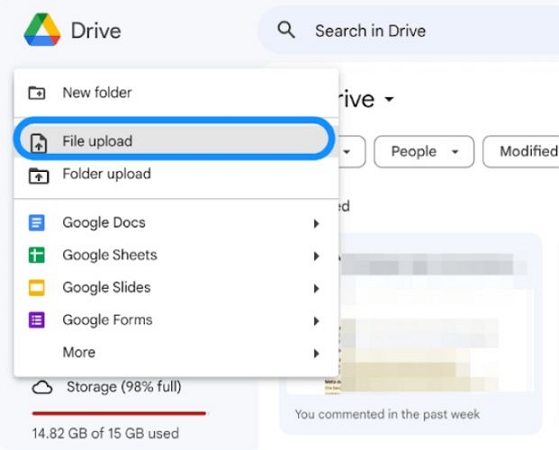
- Go to Google Drive and click New on the left.
- Pick File upload.
- When the file browser opens, navigate to the Mediaio folder holding the converted YouTube Music tracks and confirm the upload.
- Wait for the upload to complete and become part of your Drive library.
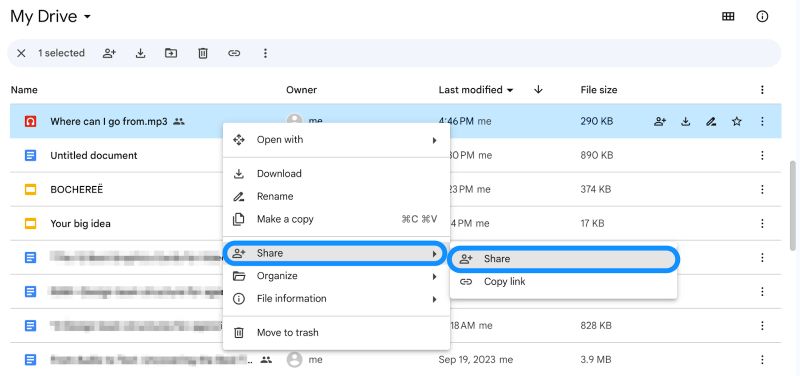
- Right-click the audio file and open Share.
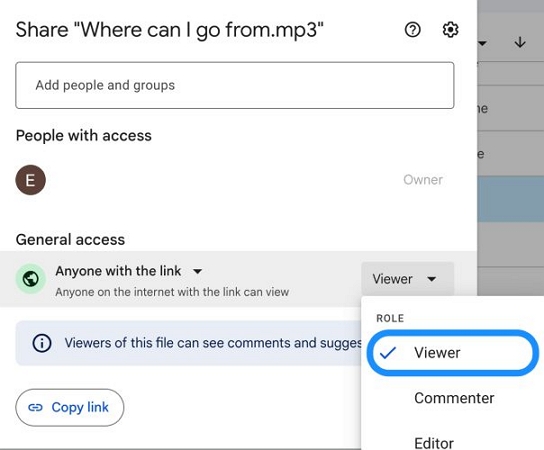
- Set the link permission to Viewer so the music plays for anyone opening the slides.

Step 3: Add YouTube Music to Google Slides for the Entire Presentation
With the YouTube Music tracks are uploaded as MP3 or WAV in Drive, inserting them into Slides takes only a moment.
1. Access Google Slides using the same Google account connected to your Drive.
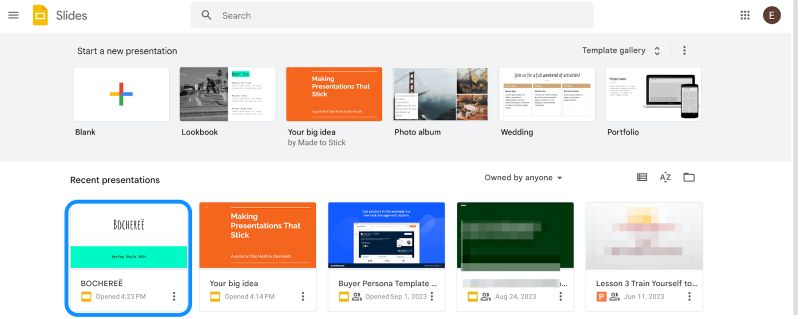
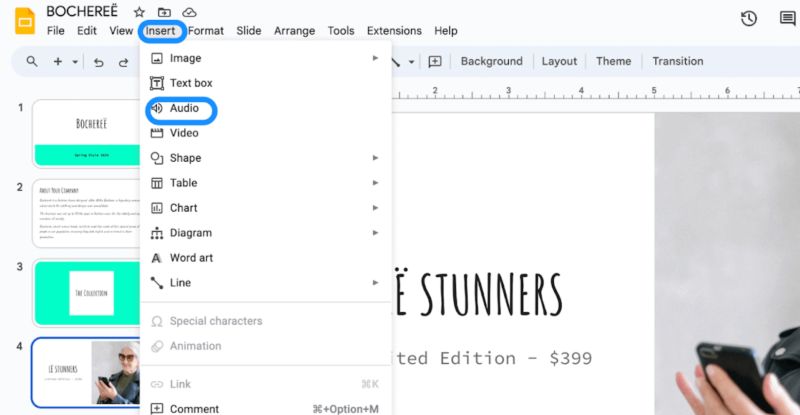
2. Bring up your presentation. Select the slide where the music should play. Then, navigate to Insert > Audio.
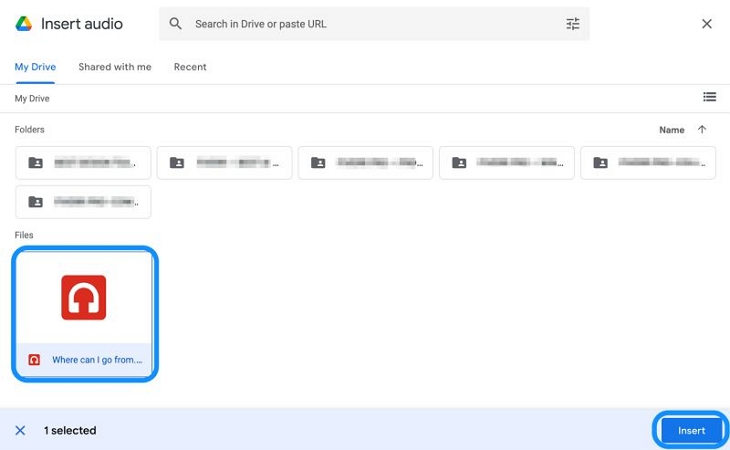
3. The Drive picker opens automatically. Choose the uploaded music file and confirm.
4. A speaker icon appears on the slide. Click the speaker icon once. This will open the Format options panel on the right. You can adjust playback behavior. Here’s what you can adjust:
- Start playing: choose whether the music begins automatically or only when clicked
- Volume: lower background audio when narration or dialogue is present
- Hide icon when presenting: keep the slide clean and distraction-free
- Loop audio: repeat the track continuously, useful for welcome or ambient slides
- Stop on slide change: switch audio between slides, or disable it to let one track span multiple slides
- Size & appearance: resize, recolor, or visually soften the icon if it remains visible.

The music will play exactly as configured in the presentation mode—automatic or manual, looping or single-slide, without interruptions.

Tip: How to Get Free Music for Google Slides
All the platforms below allow free use in presentations, including commercial decks:
- Client presentations
- Pitch decks
- Classrooms and lectures
- Recorded slide videos
What you should not do:
- Resell the music files
- Re-upload them to other sites
- Redistribute the tracks as downloads
If someone else needs the same music, simply point them to the original site. Do not share the files directly.
Here are four reliable options that work well with Google Slides.
Clean metadata Free for commercial use
Attribution usually not required Stable
No ads
Built for slides and videos
High quality
Consistent loudness Free for commercial use No attribution Fast downloads
Clear rules
No surprises
Clean masters
Slide-friendly length Free for commercial use
No attribution Music that doesn’t overpower narration
128–320kbps
Varies by track License varies Some tracks need attribution More variety for users
Final Words
That covers up all the main ways to add music to Google Slides from YouTube. Among these options, converting YouTube Music to MP3 or WAV is the most reliable choice when presenting in classrooms, formal, or any other scenes. Once the music is local, there will be no ads, buffering, or playback failures.
Mediaio Audio Converter fits naturally here because it turns YouTube Music tracks into clean audio files you can keep on your computer. So you’re not just setting things up for one presentation, but you’re building a reusable music library you can use for future slides, offline practice, or other personal needs.